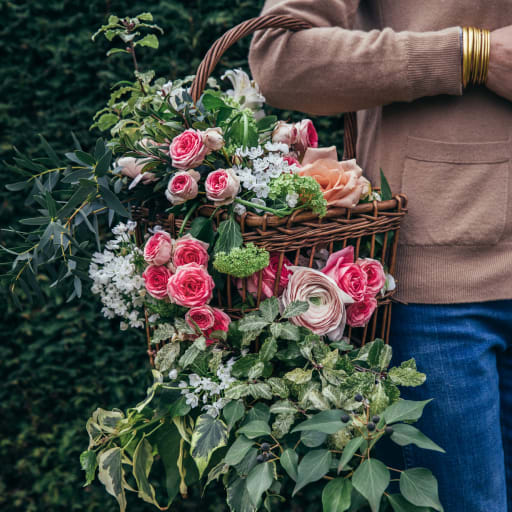
My Creative Table by Lisa Gachet
Lisa Gachet
Lisa Gachet is the artistic director and founder of the brand Make My Lemonade, a very colorful and joyful ready-to-wear brand for women. The little extra feature is that you can buy our clothes ready-made like a classic brand but you can also buy the sewing pattern of our pieces and make your own clothes!
Lisa has always loved floral colors and patterns. Beyond the beauty and ornamental aspect of color, she sees a therapeutic dimension to it, wrapping herself in color, painting or drawing with bold and vibrant colors have always had a real impact on her well-being and joy.
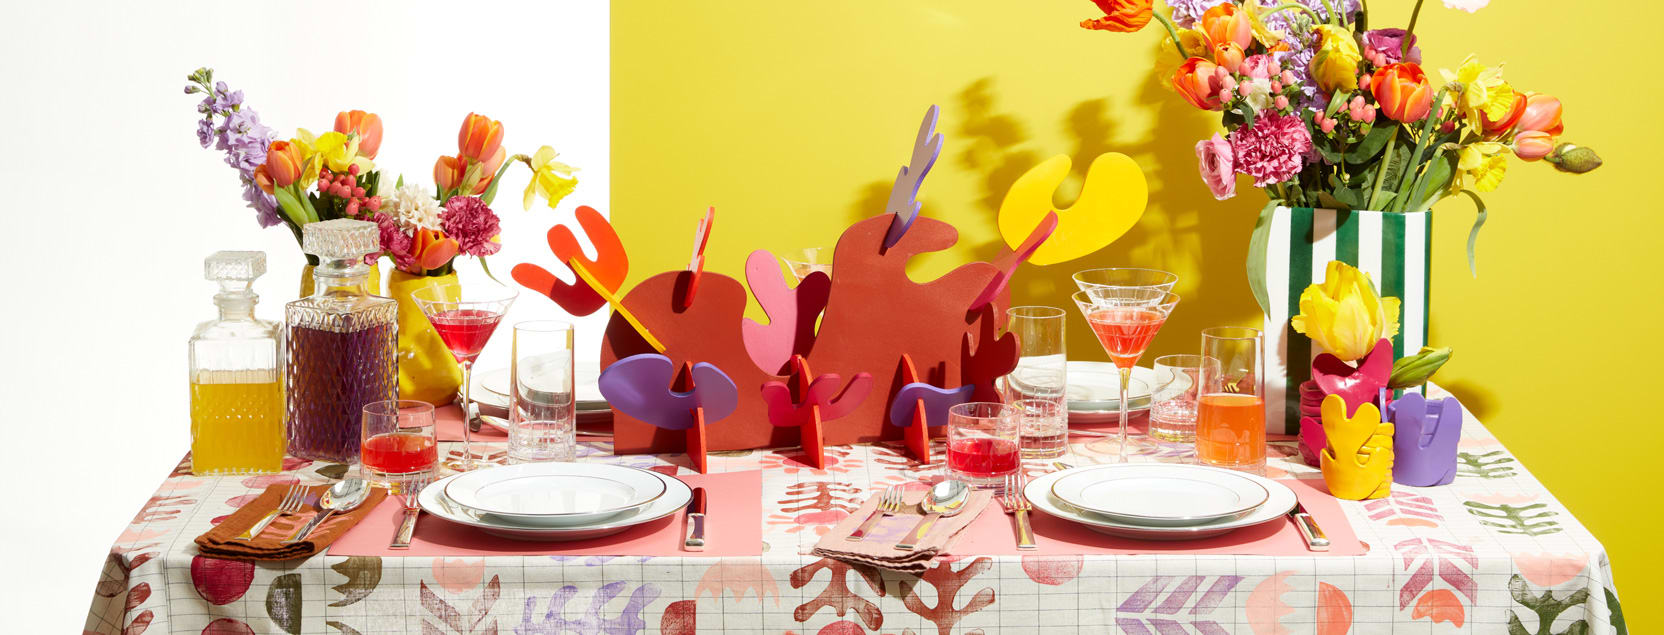
For Christofle, Lisa presents three simple do-it-yourself creations for a colorful table!
Small colored clay pots
What you need :
- self-hardening clay
- a sharp scalpel or cutter
- a little bit of water
- a rolling pin or smooth bottle
- cans of paint
- some paper to protect your surfaces
#1 Start by gently working your clay between your fingers.
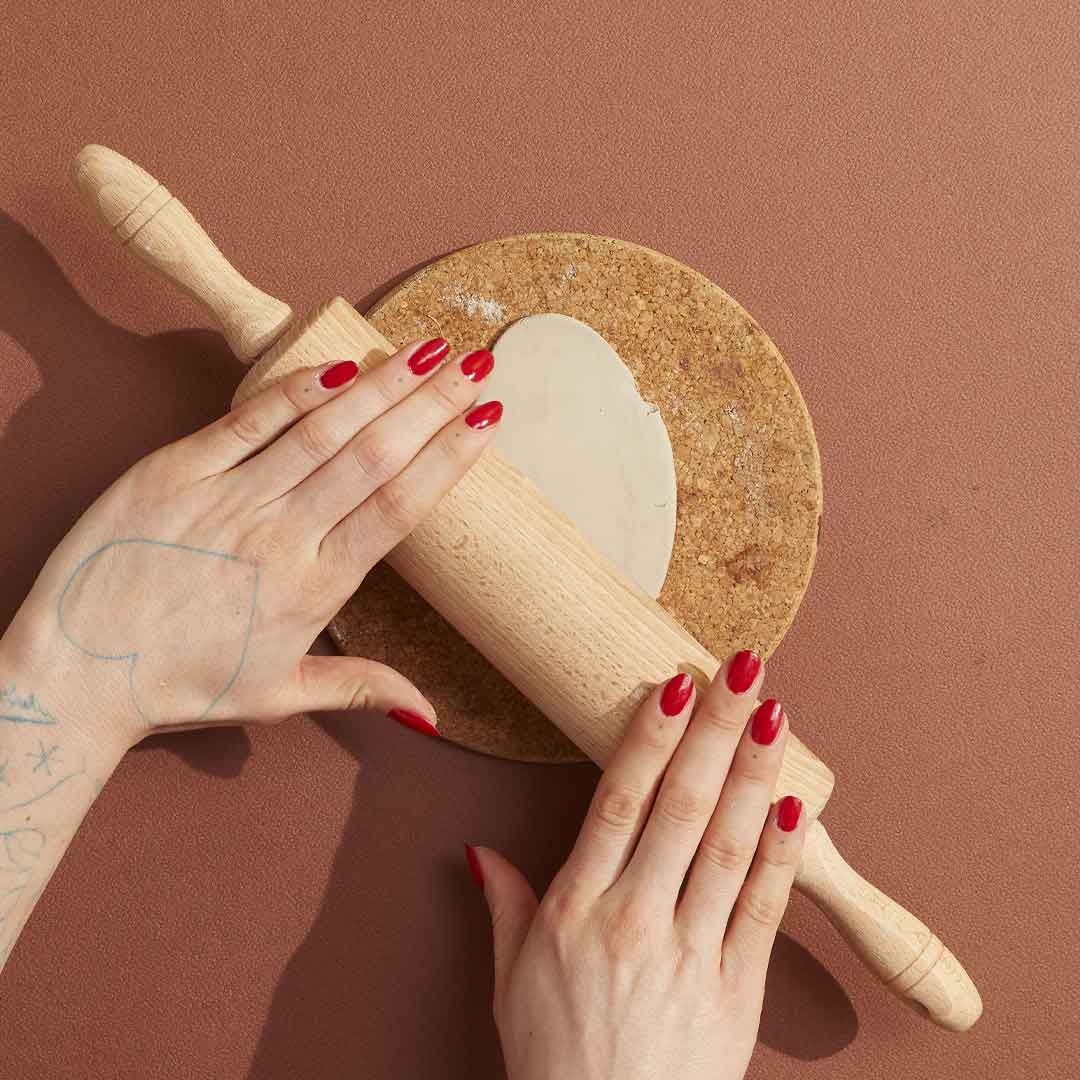
#2 Once the clay has softened, roll it out 1cm with a rolling pin, this will serve as the base for your little pot.
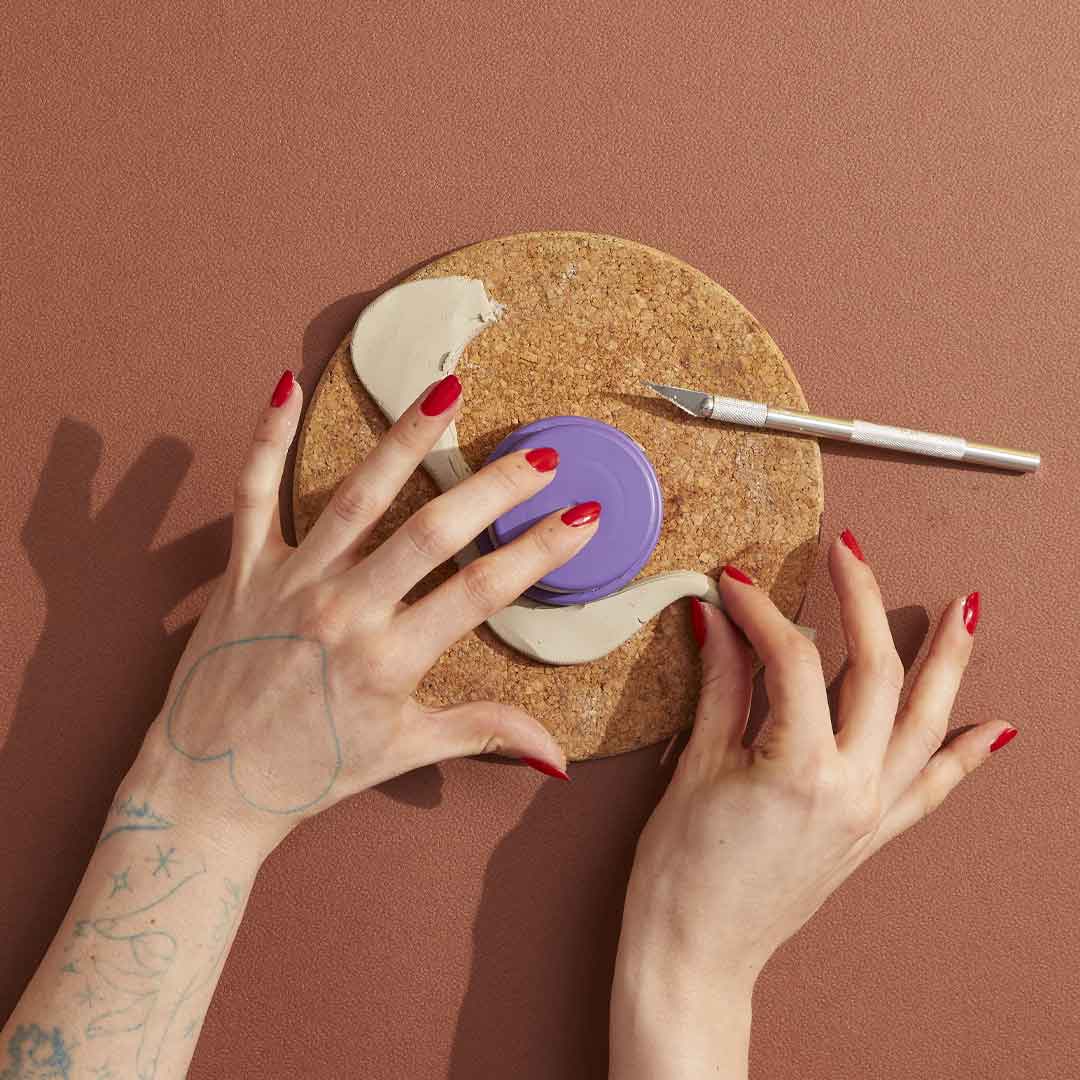
#3 Using a scotch tape roller or a paint can cap, trace the base of your pot and remove the excess with your scalpel. Smooth the edges of your base with your finger.

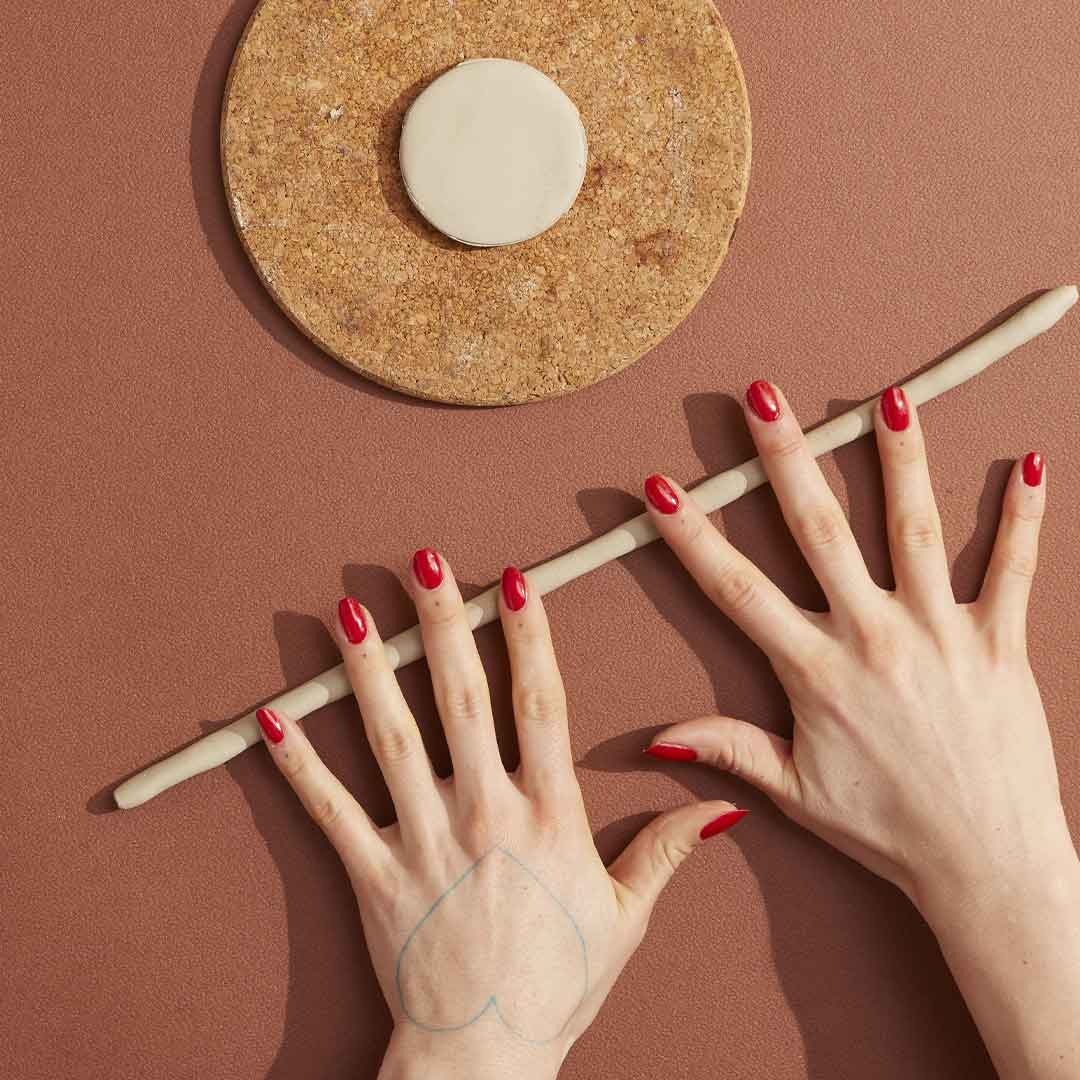
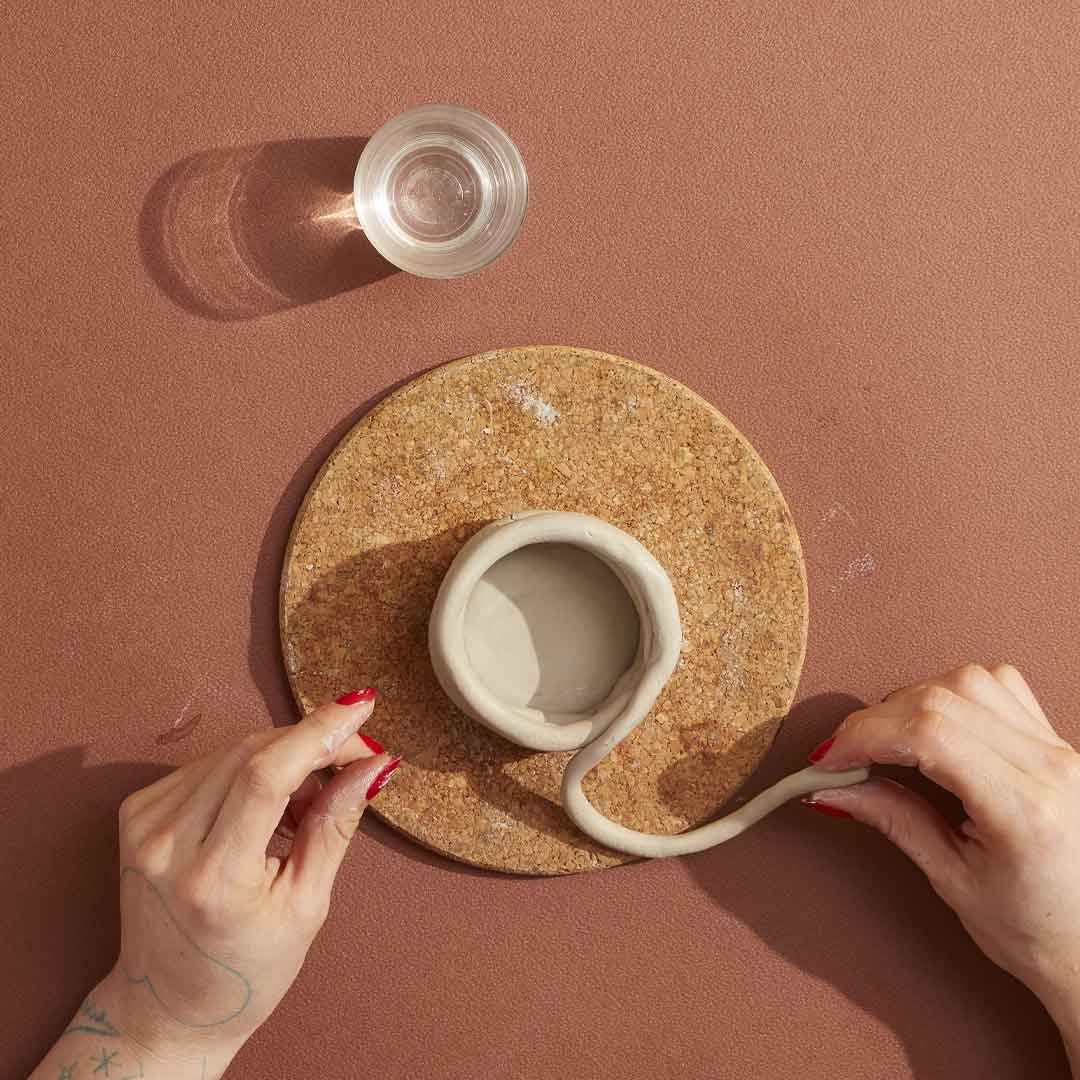
#4 Take a little clay and form between your palms a clay coil as evenly as possible.
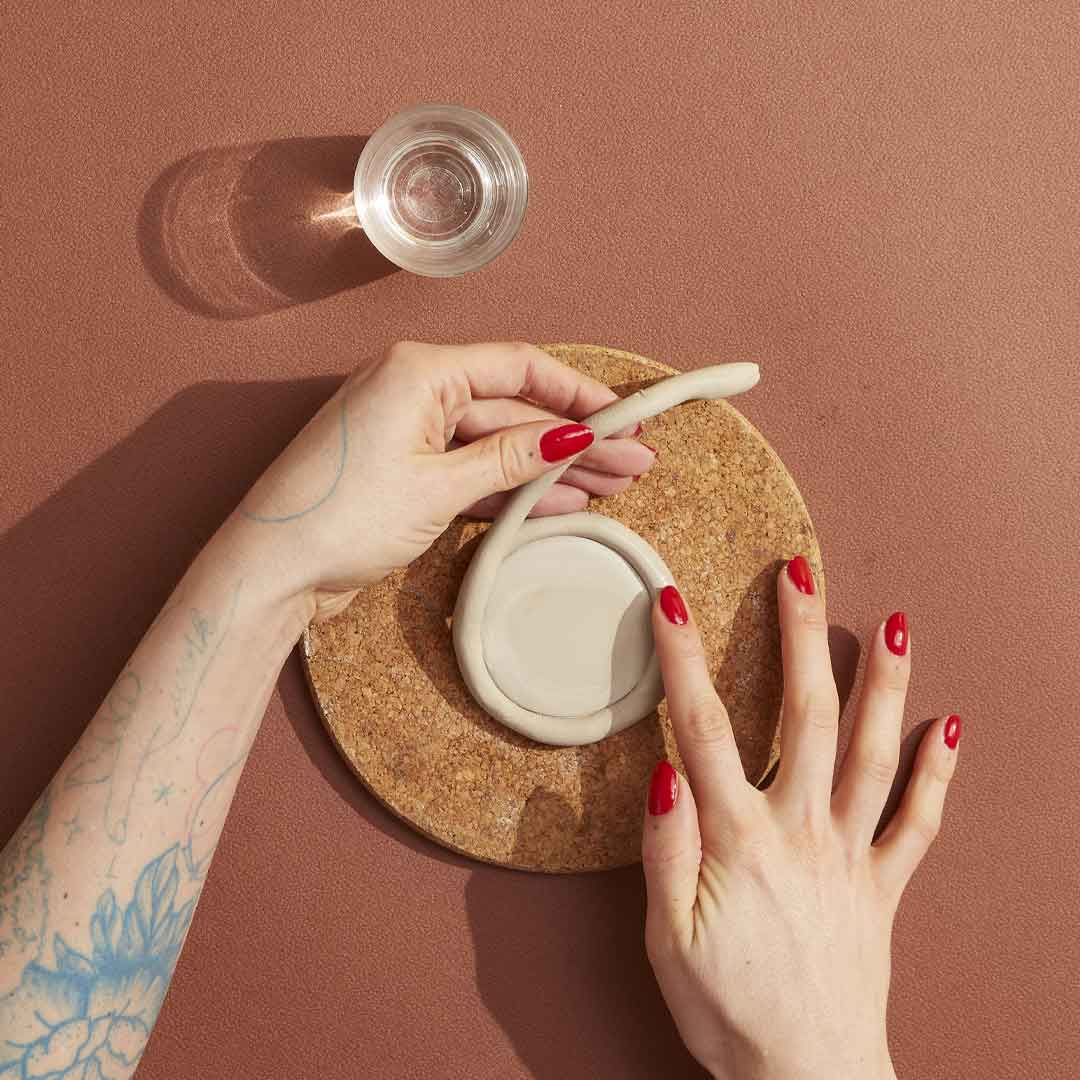
#5 Wet the base of your pot before assembling your coil, the water will serve as a binder.
#6 Wrap your coil around the base of your pot and press well to avoid creating small air spaces especially if you want to use these pots to make vases.
#7 Continue to form coils to build up the walls of your pot. Between each level of clay, do not forget to wet the different coils and press lightly so that your pot is well sealed.
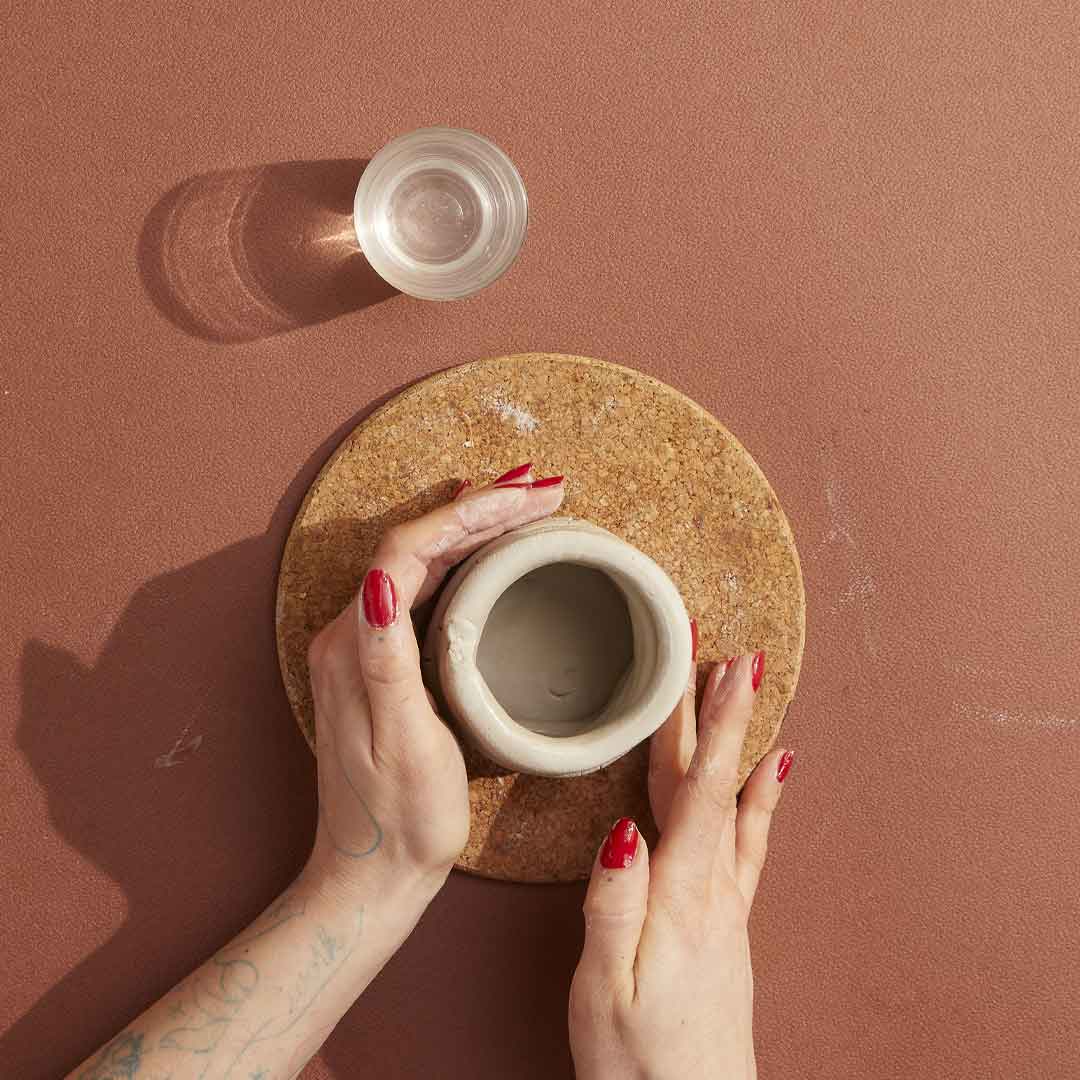
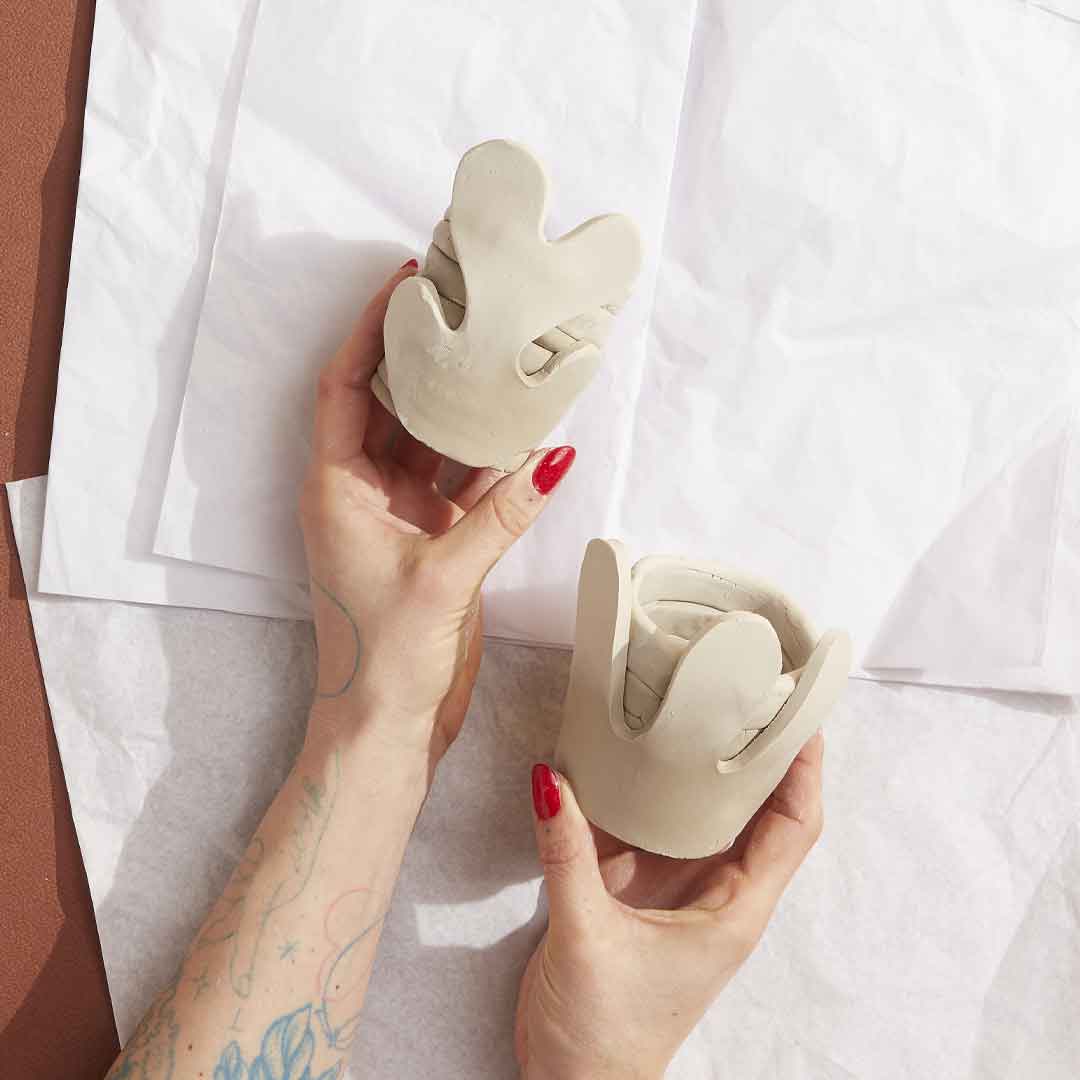
#8 Once you have reached the height of your pot, hold the clay strands together with your hands and smooth them with a little water if necessary.
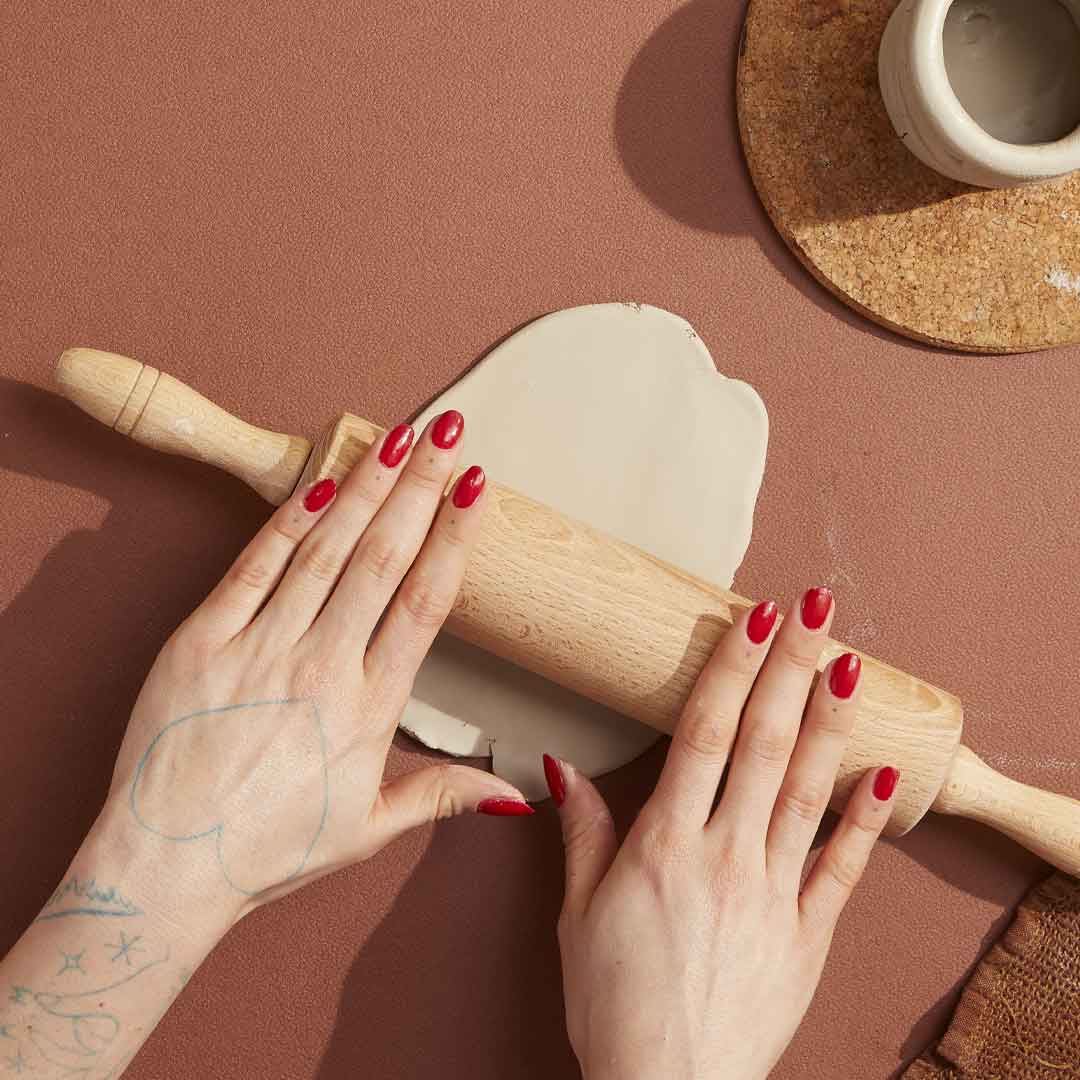
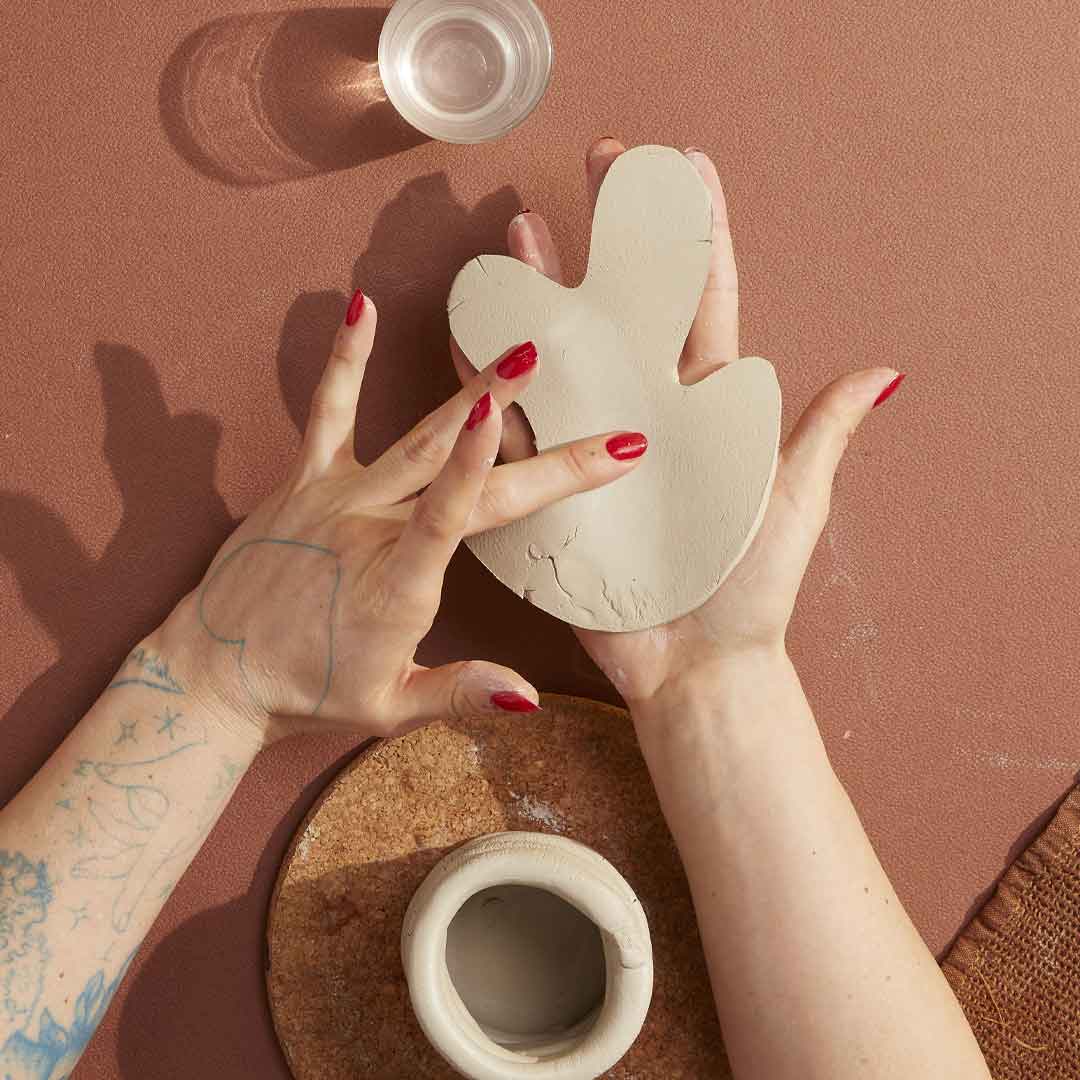
#9 Now to decorate your pot, take some clay and roll it out with a rolling pin to 1 cm thick.
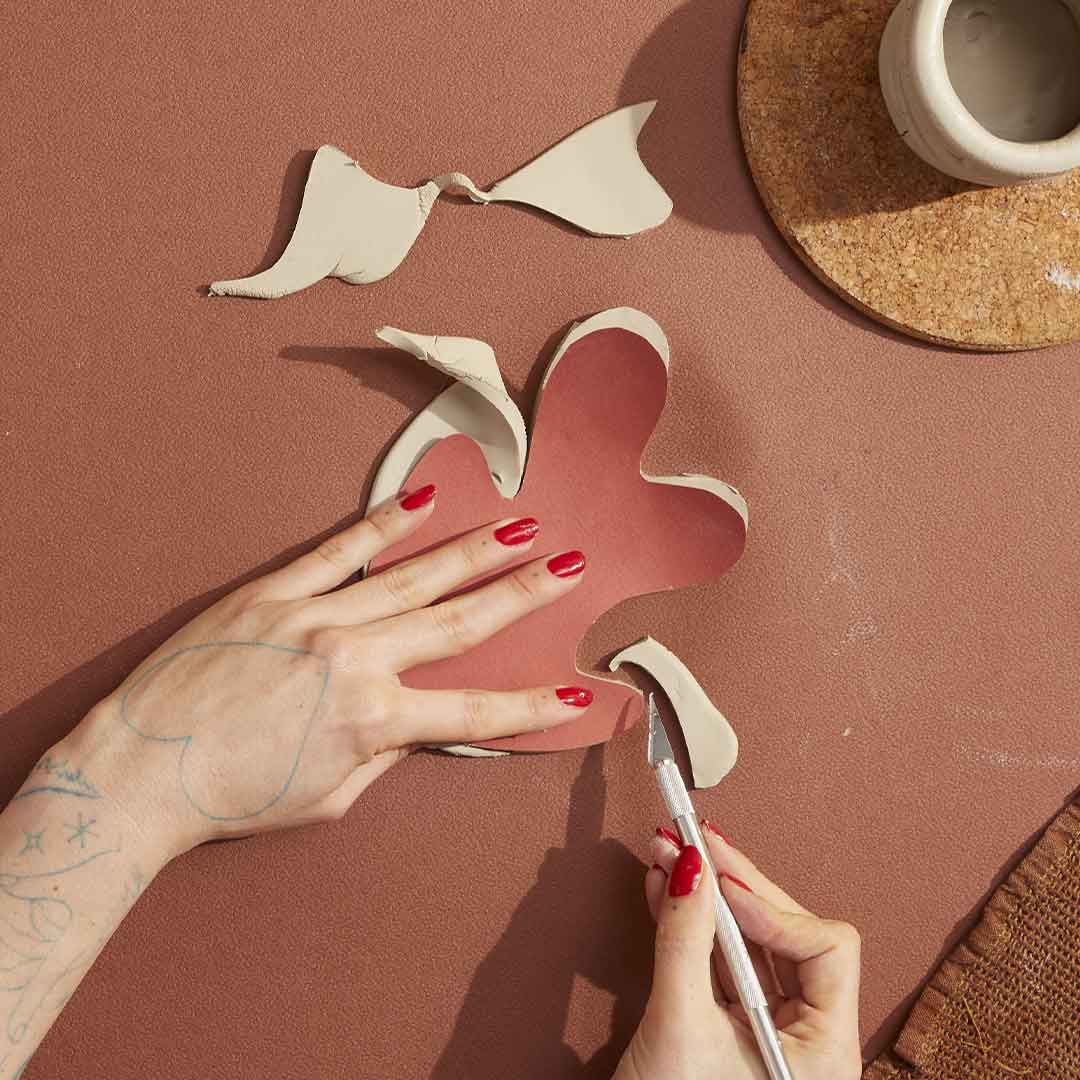
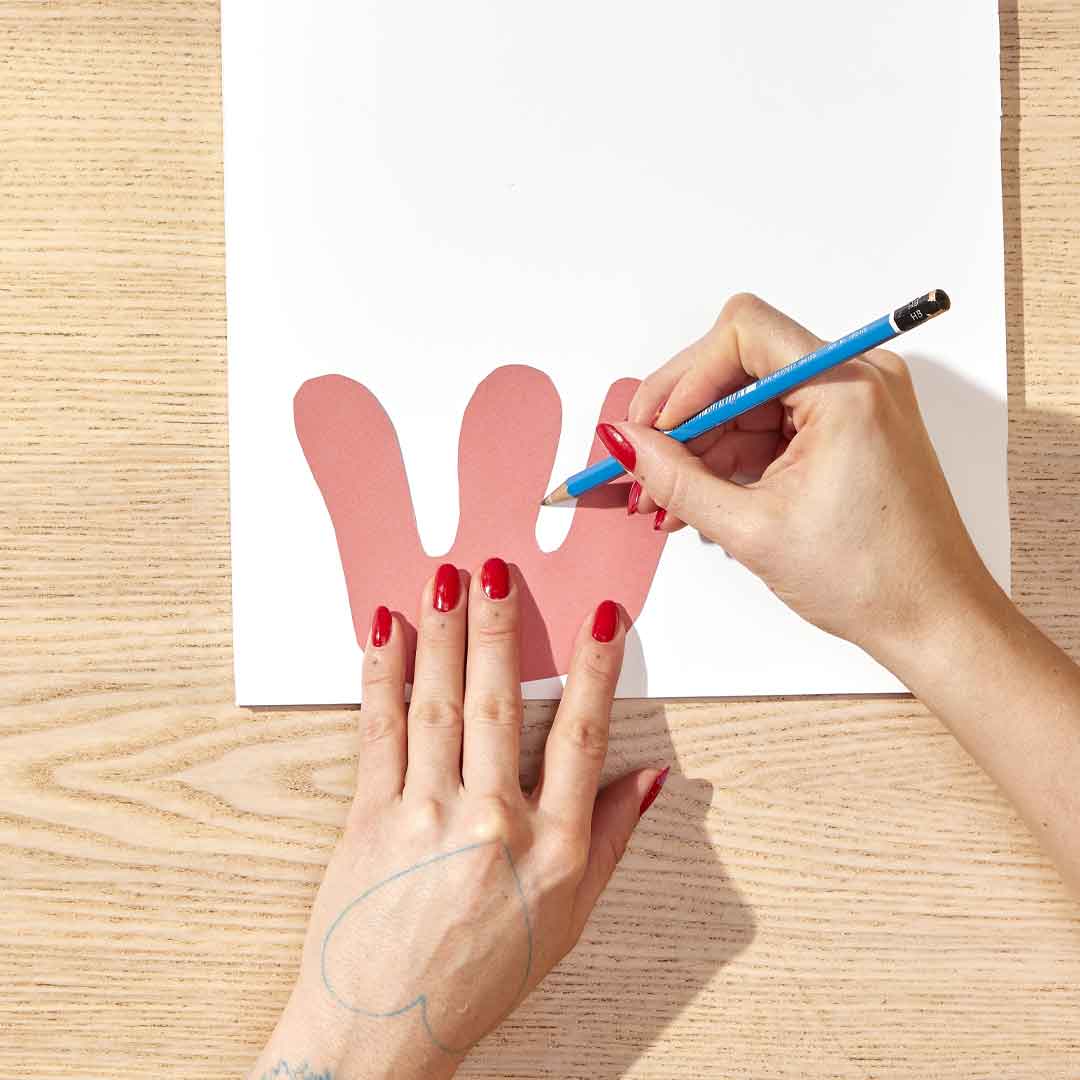
#10 Take the pattern for your pot liner, which you will have drawn beforehand. Using the scalpel, trace your shape in the clay.
#11 Gently take the shape in your hand and wet the part that will be in contact with your pot.
#12 Place the shape on the outside of the pot and hold the pressure until the water dries a bit and you are sure that the two parts are well attached. You can smooth the edges of your shape with your fingers at this point.
#13 Let it dry for at least 48 hours!

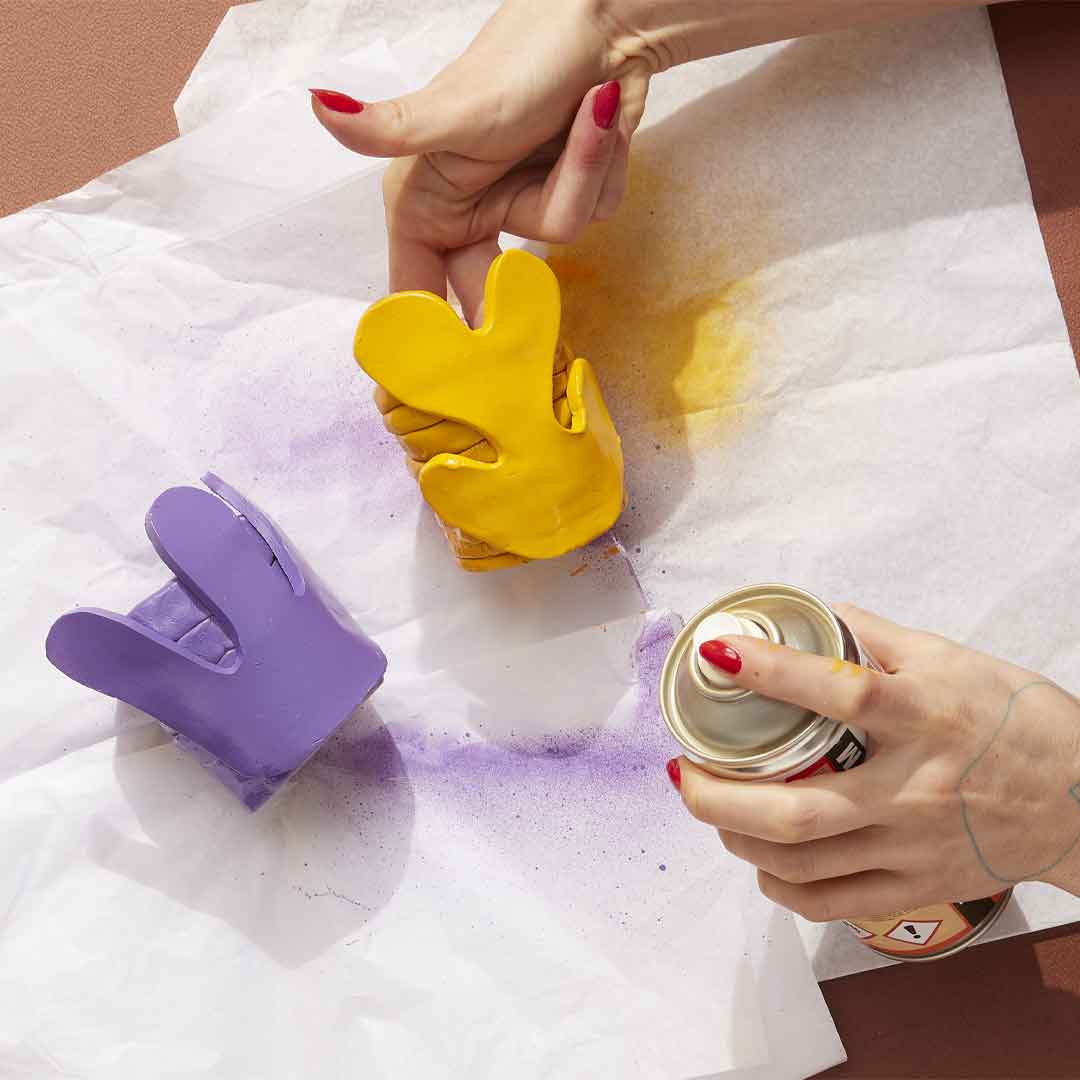
#14 Once your creations are dry, get out your colors and for a beautiful, vibrant and uniform color, spray paint is the best! Protect your surfaces and spray your items in several thin layers to avoid drips.
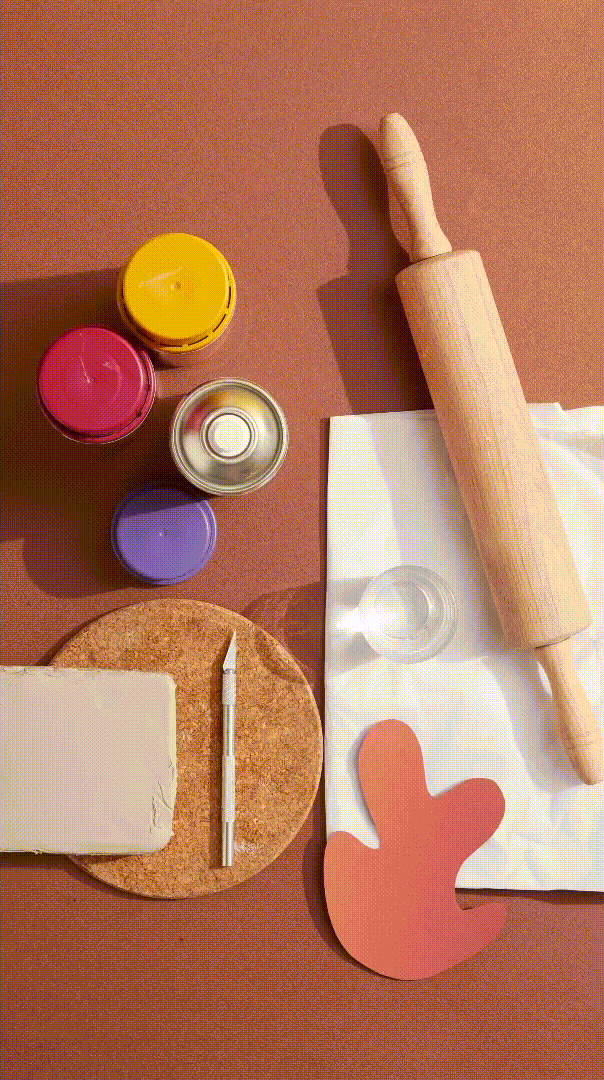
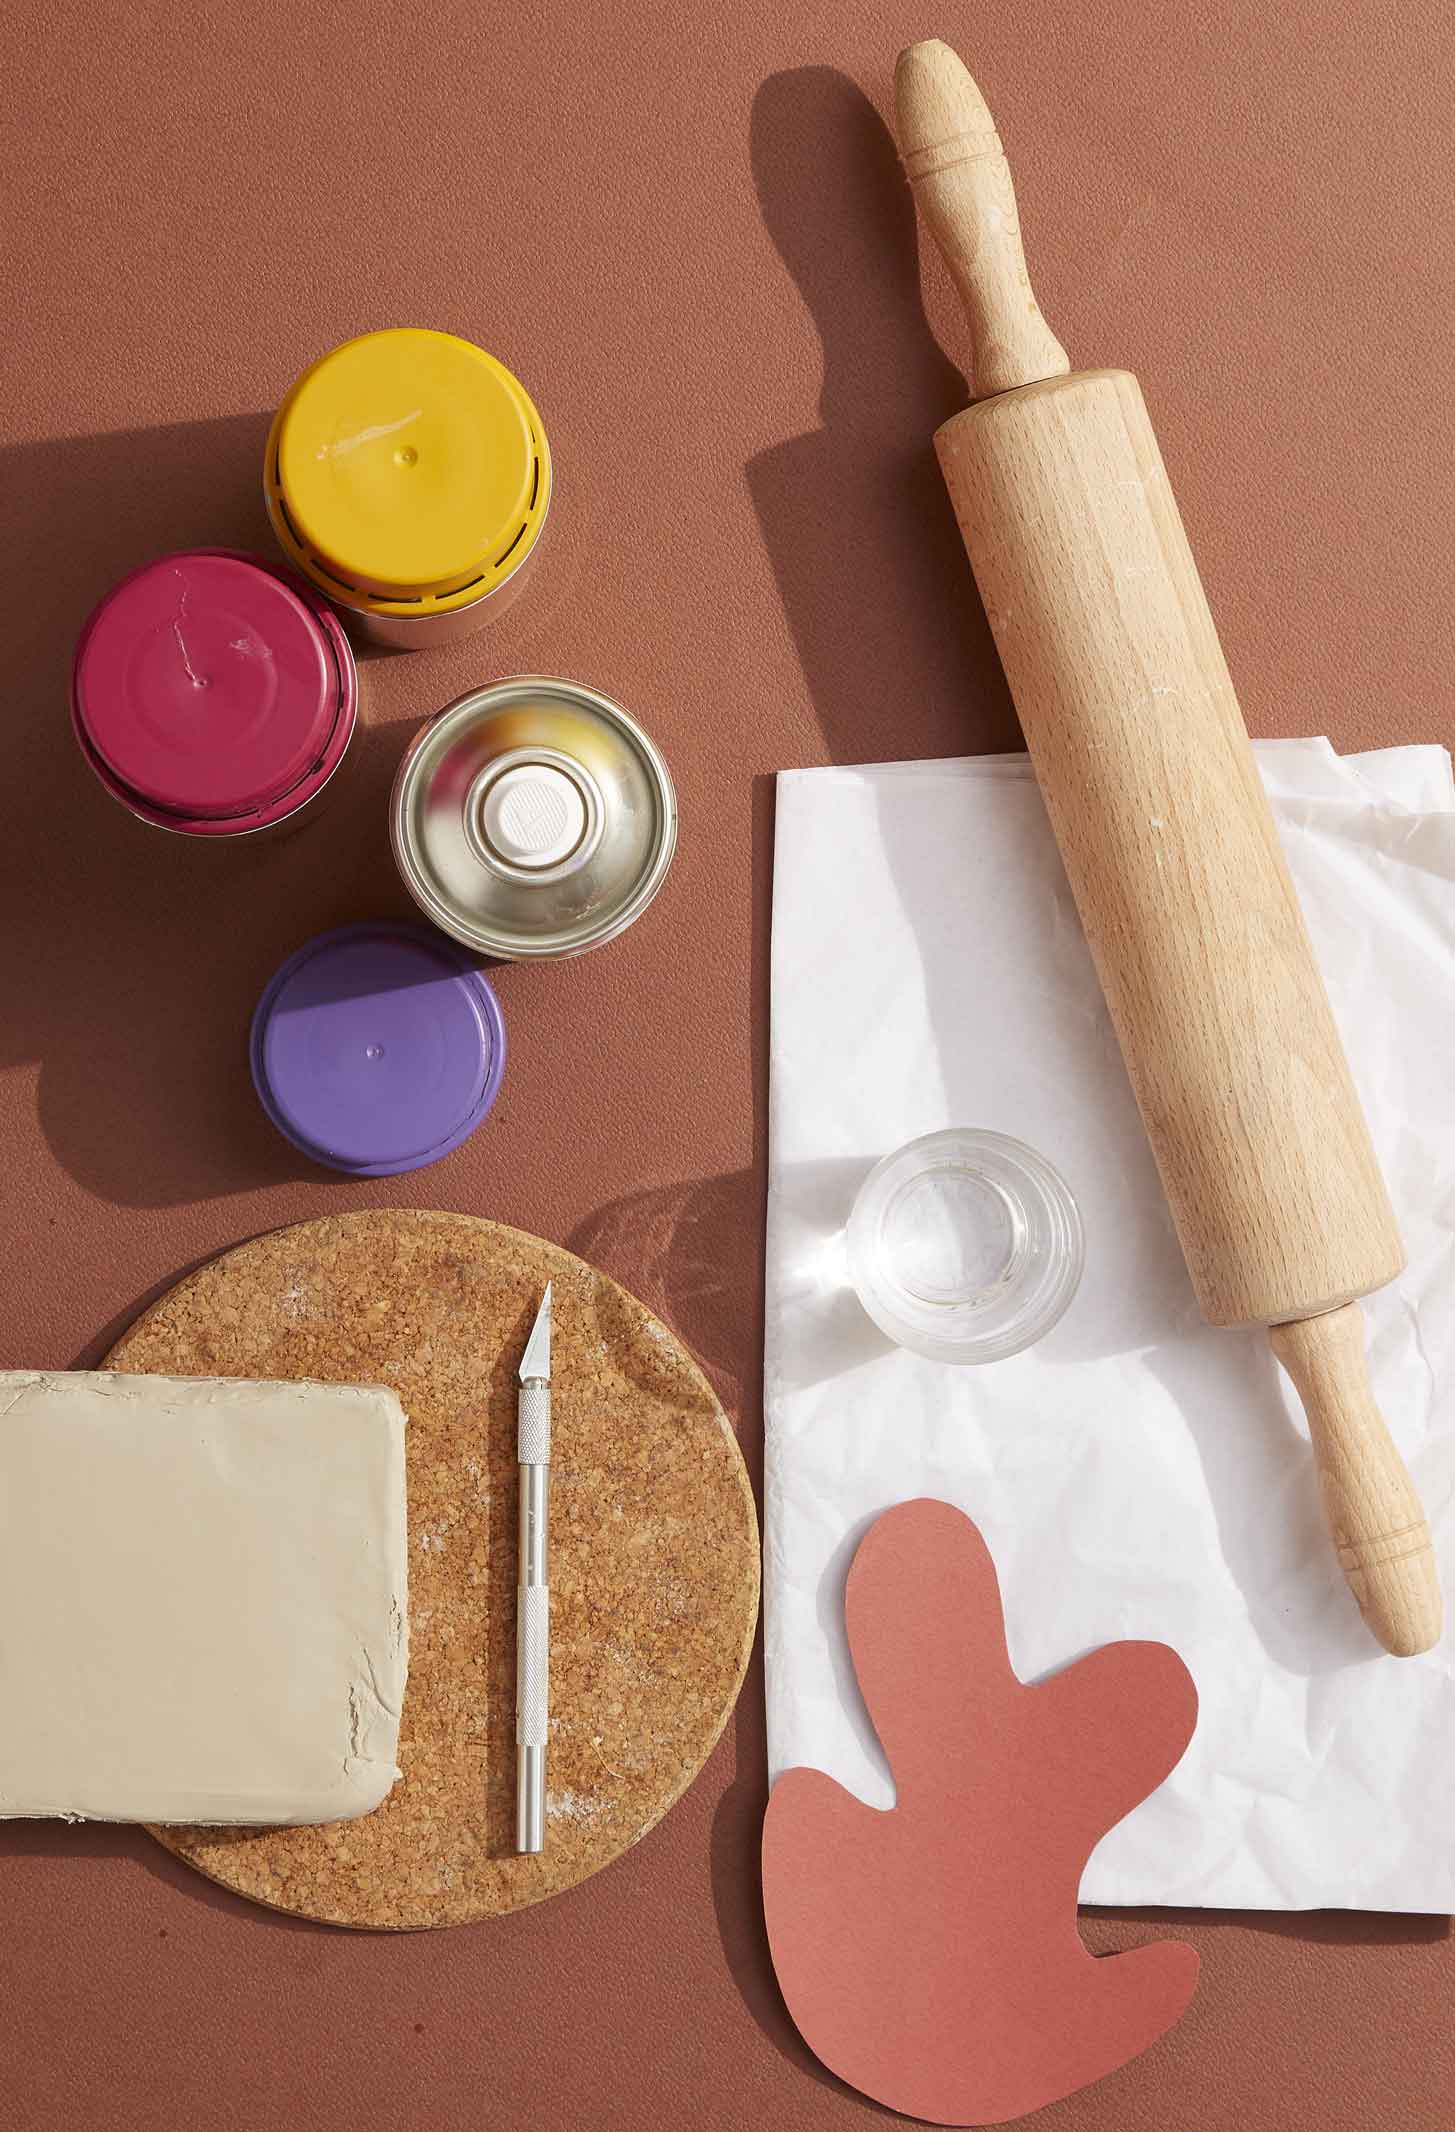
MODULAR CENTERPIECE

What you need :
- sheets of foam core cardboard
- the template of the shapes to cut out. Download the pattern HERE
- acrylic paint
- a small flat brush and a foam roller
- a scalpel or a cutter with new blades
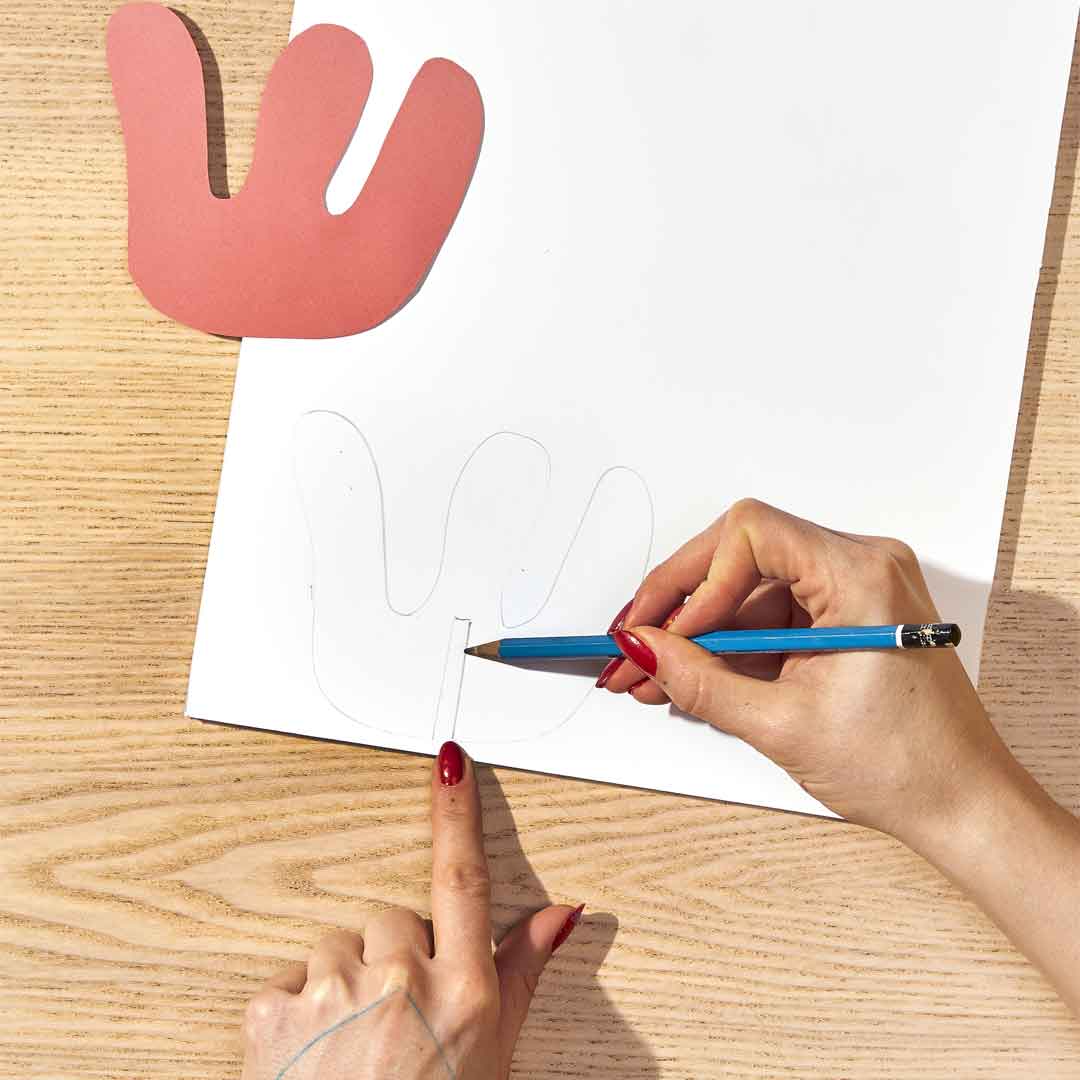
#1 Start by transferring the template of your centerpiece to the cardboard.
#2 Don't forget to transfer the different slots: here the cardboard is 5mm, so the slots will be 5mm wide. Adapt the width of your slots according to the thickness of your cardboard.
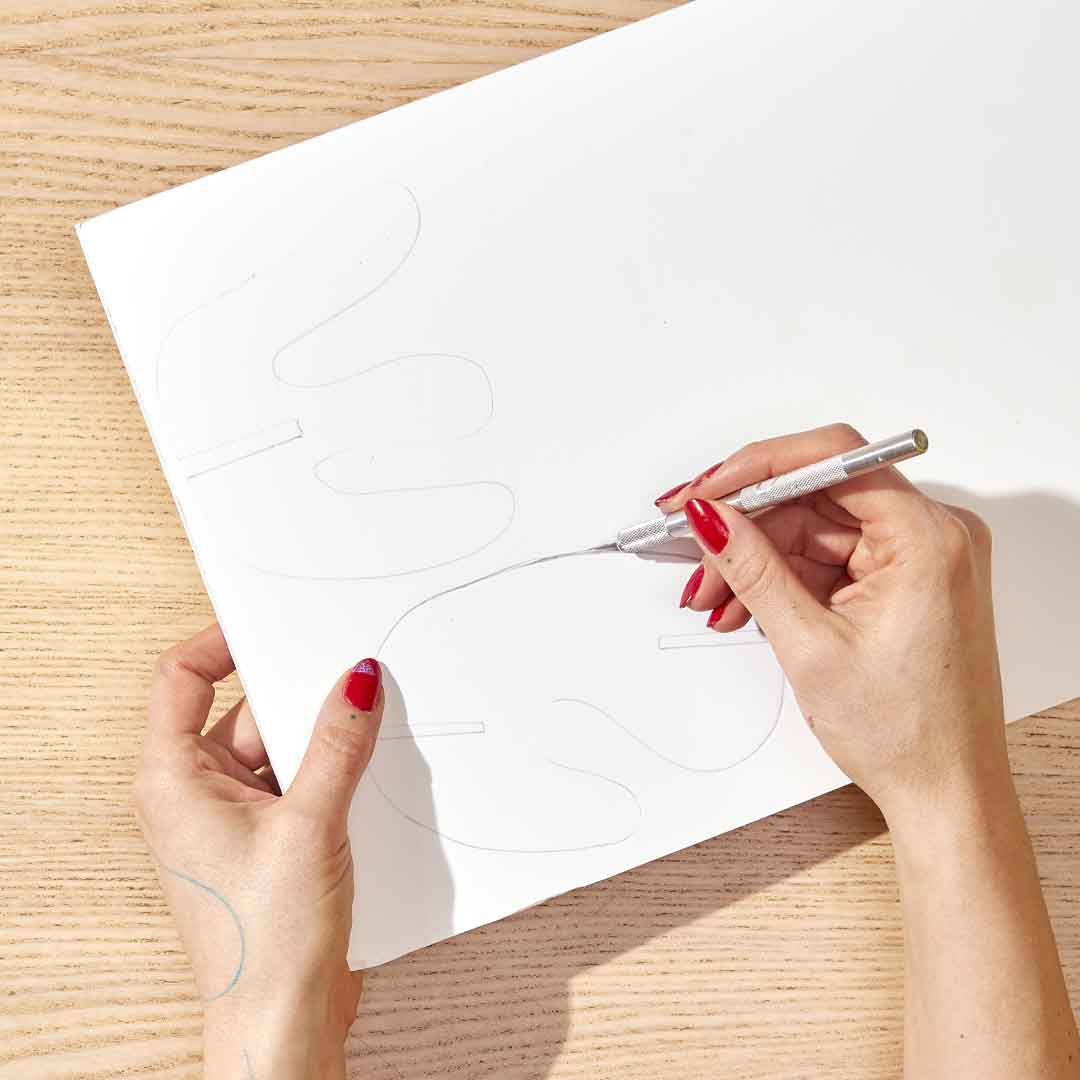
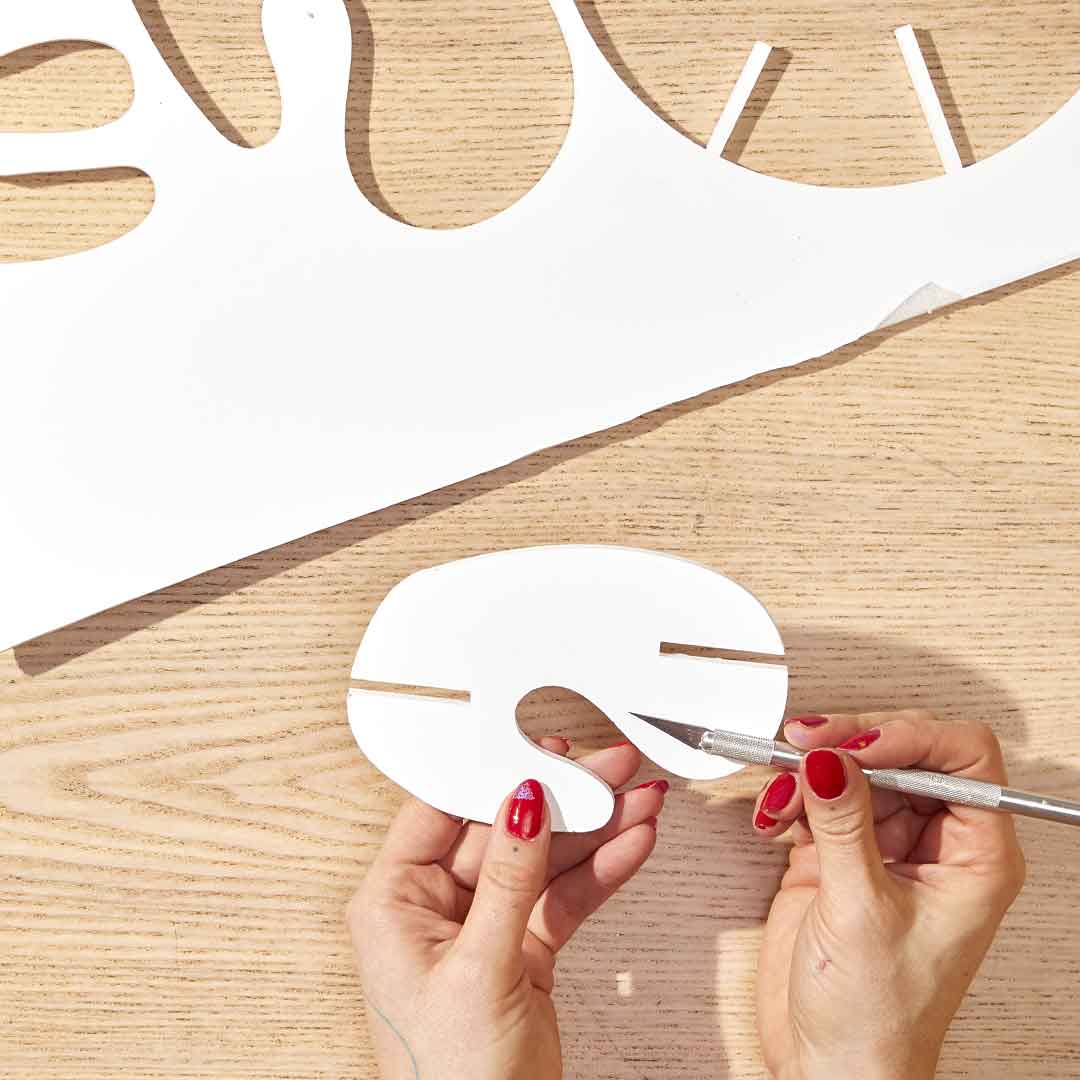
#3 If you ever feel like letting your imagination run wild by creating new shapes, have fun! The secret of a clean cut in core cardboard lies in 2 tips: new blades, and always cut with the blade perpendicular to the cardboard.
#4 Cut all your shapes properly. Take all the time you need to be as precise as possible.
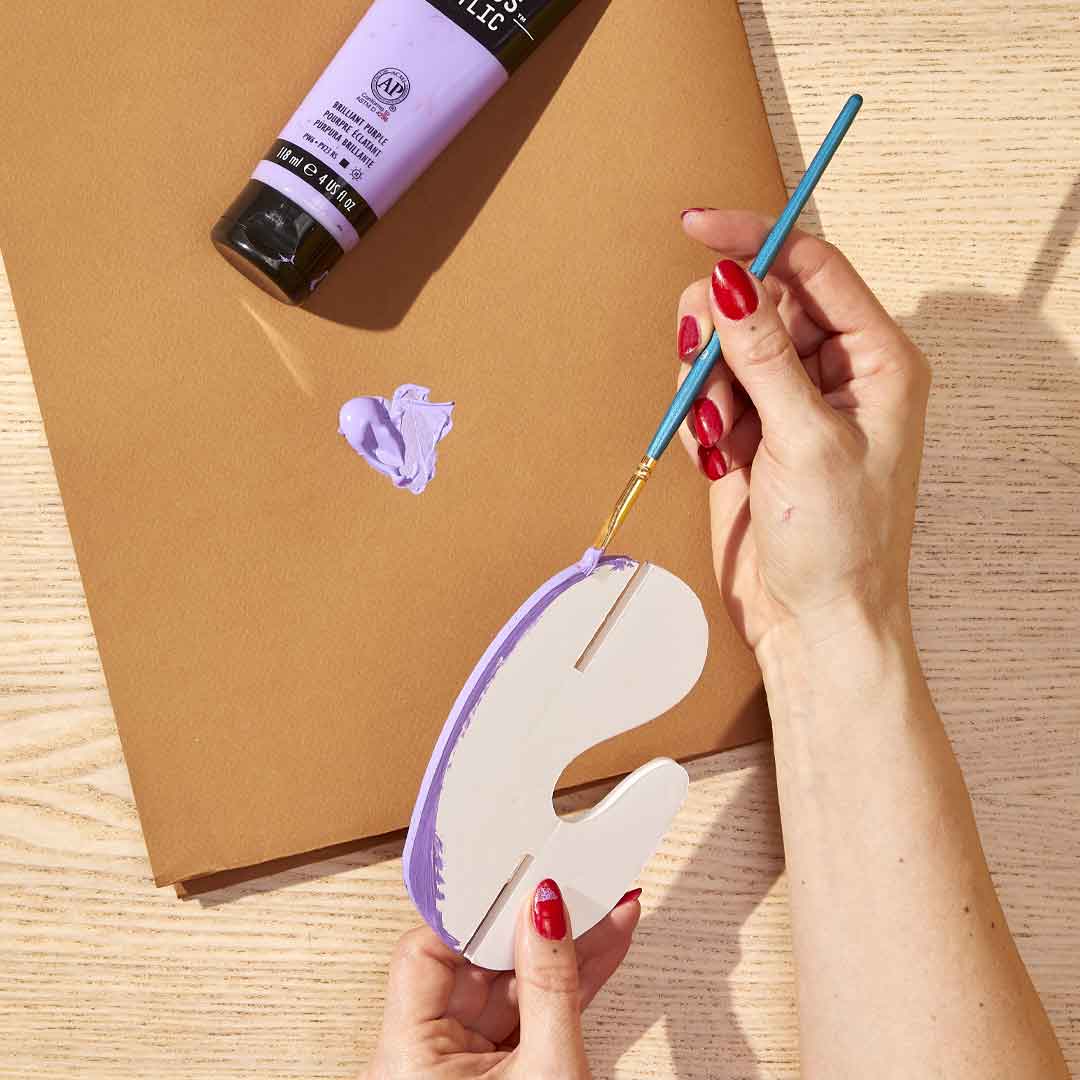
#5 Take a small flat brush and start painting the outline of your shapes, then let it dry before moving on.
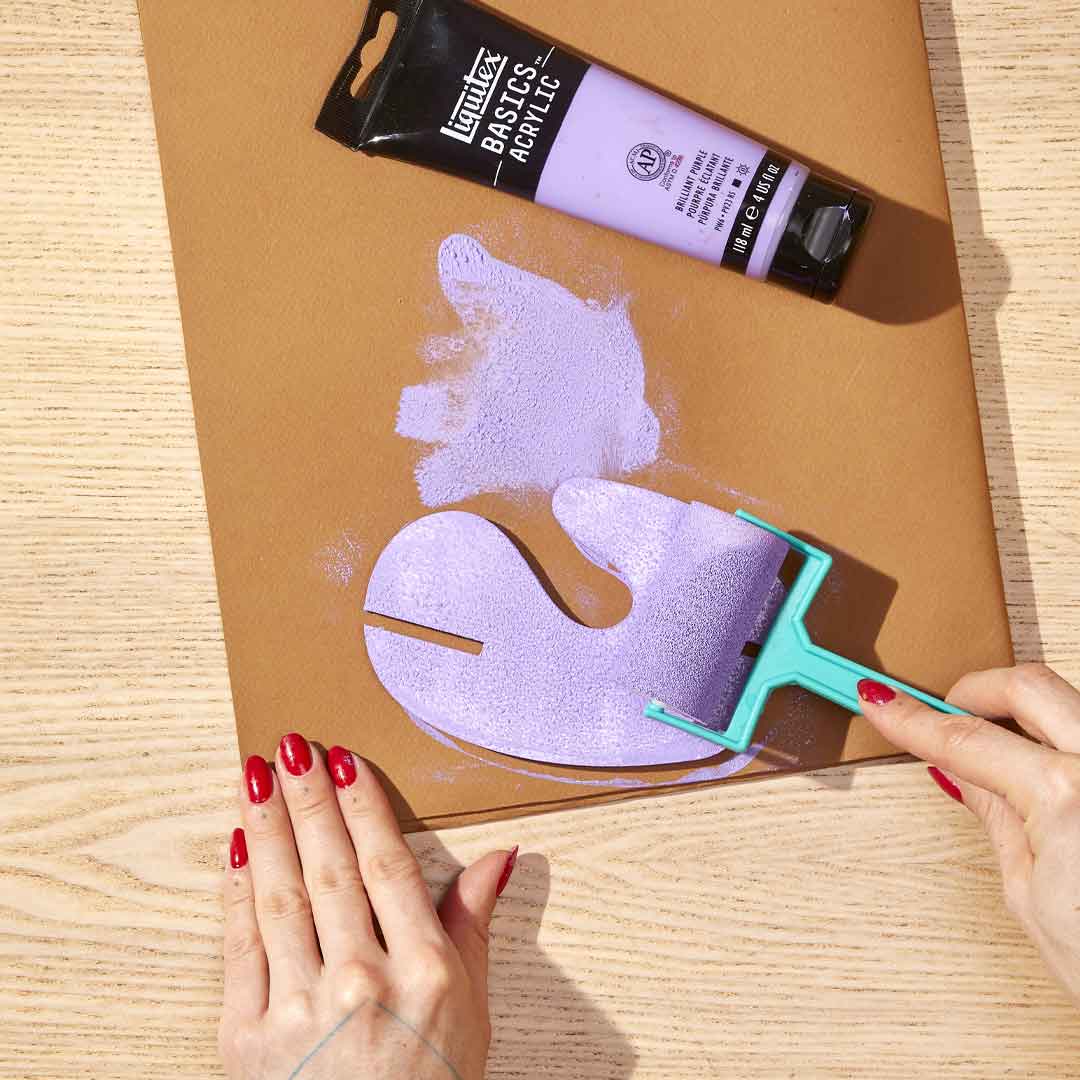
#6 Using a small foam roller, paint the front and back of your shapes, don't forget to let it dry well between the 2 layers.
#7 Have fun with colors and shapes!

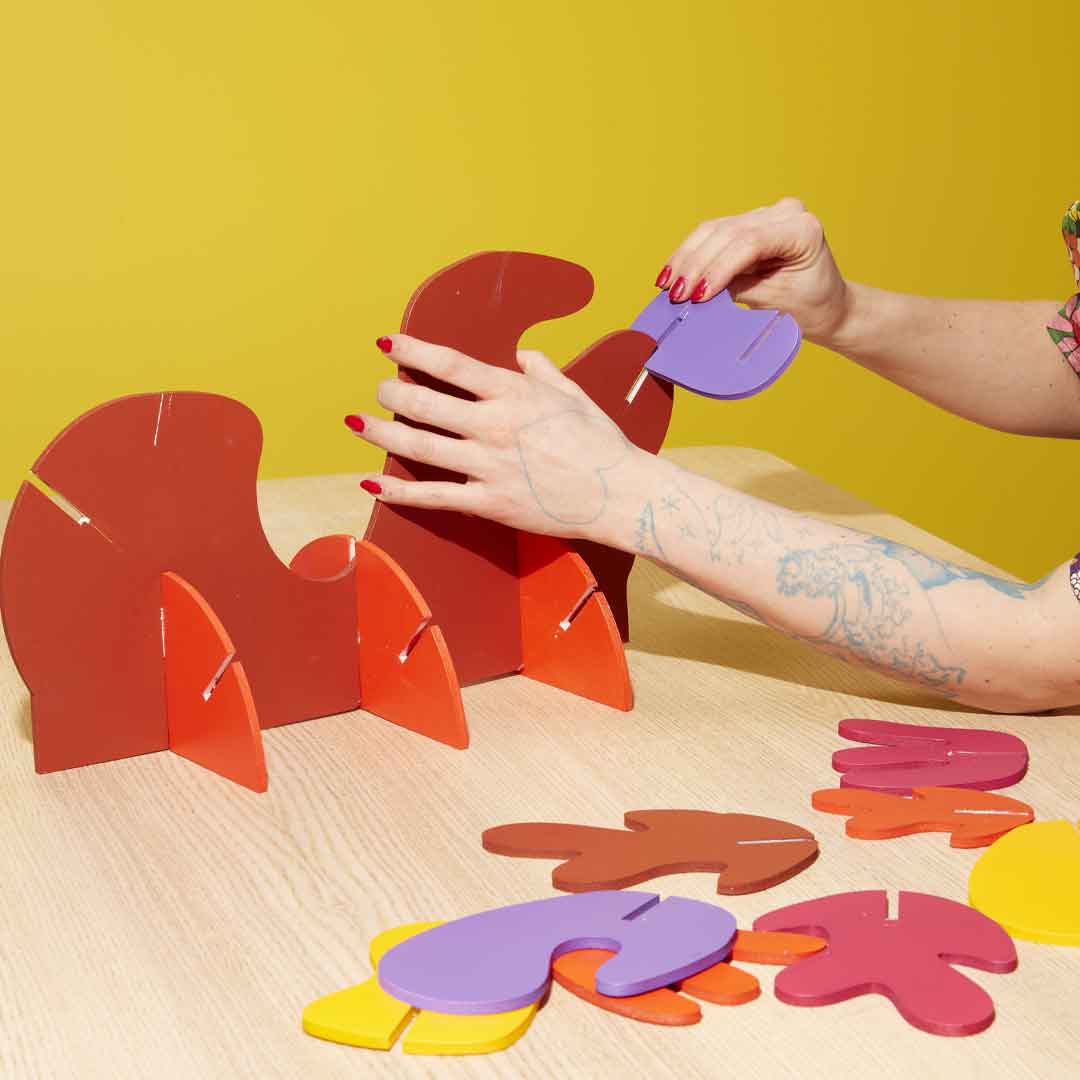
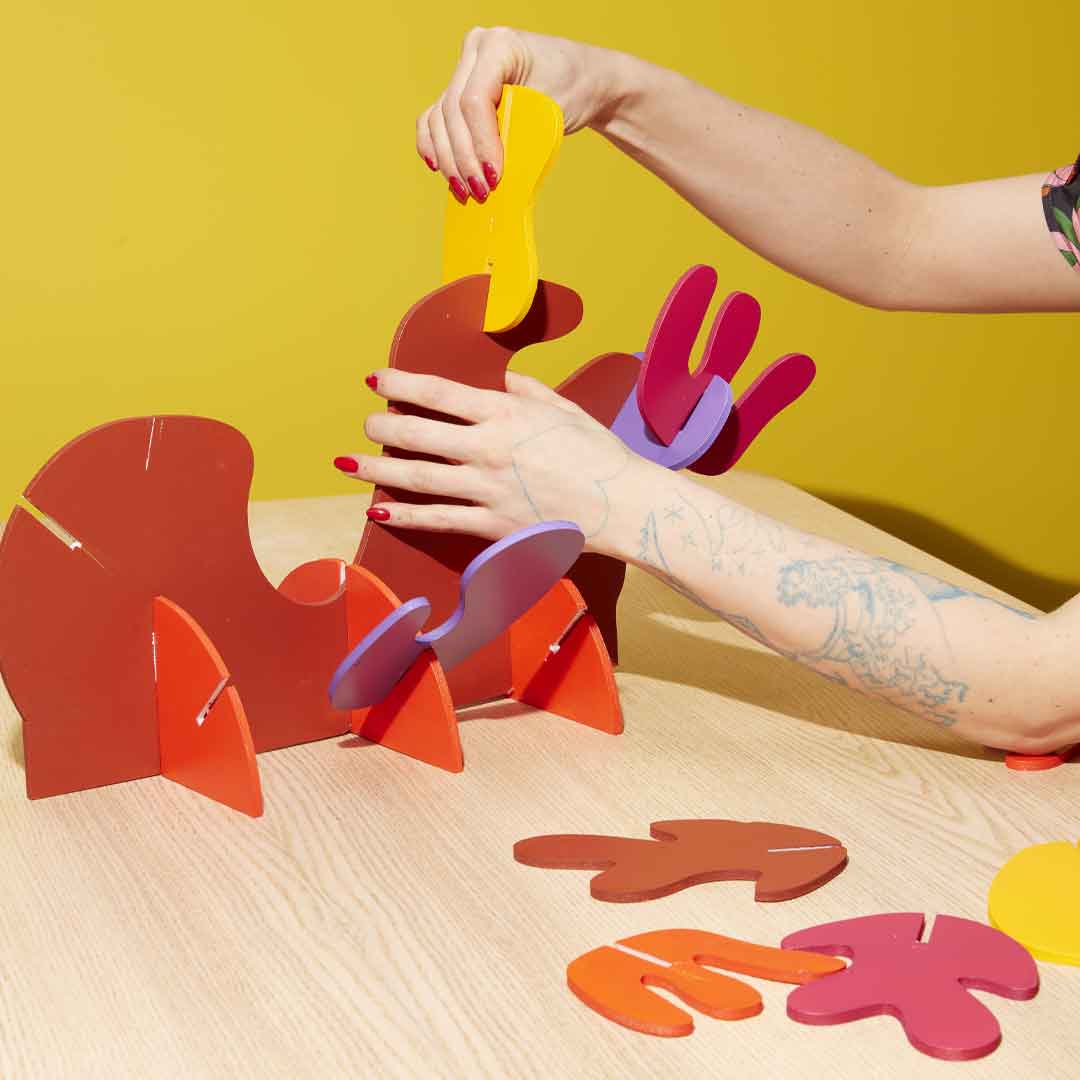
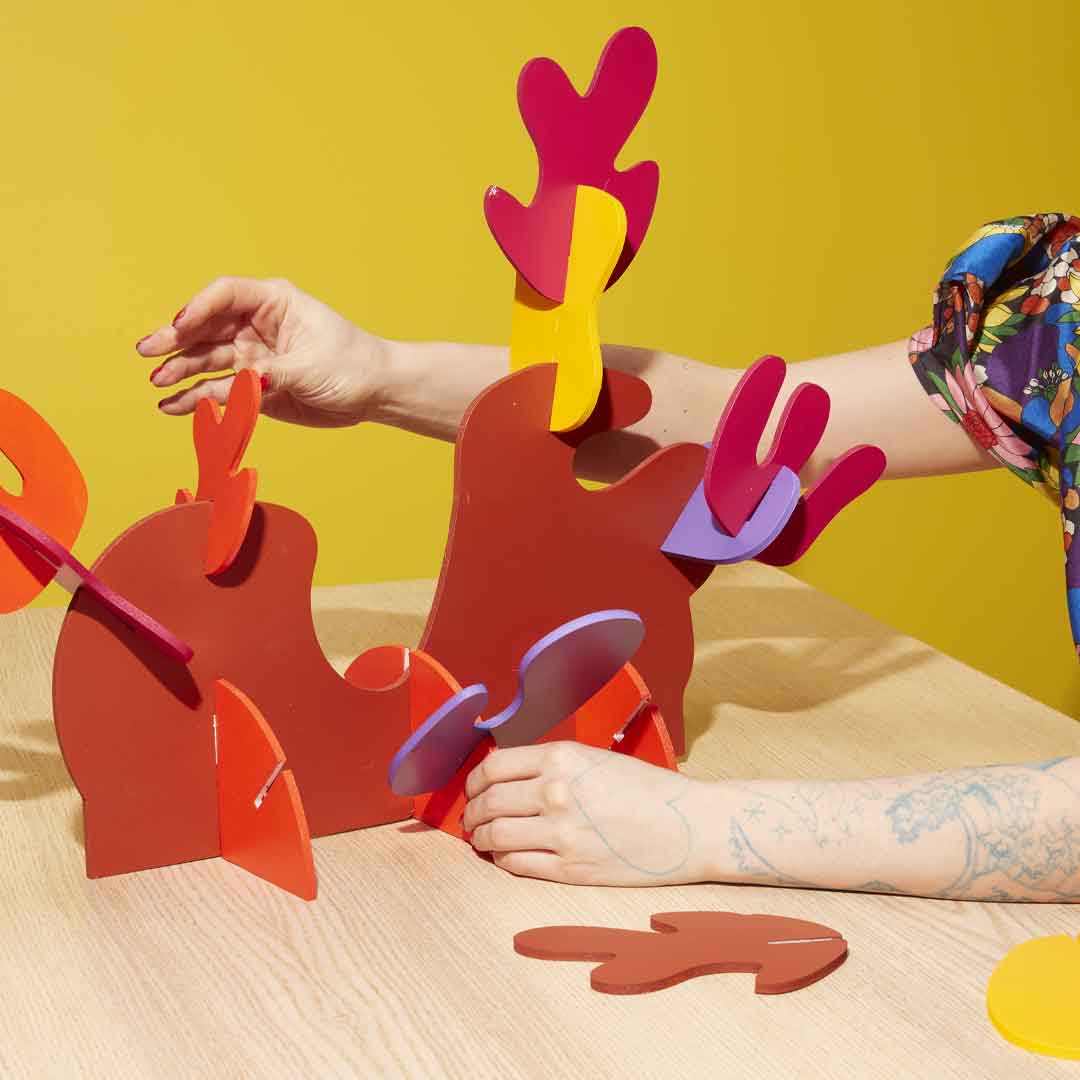
#7 Then assemble the 3 half circles - that will serve as the base of your centerpiece - with the largest of the shapes and play with the slots and shapes to create a tree structure. If this reminds you of a construction game from your younger years, enjoy it!
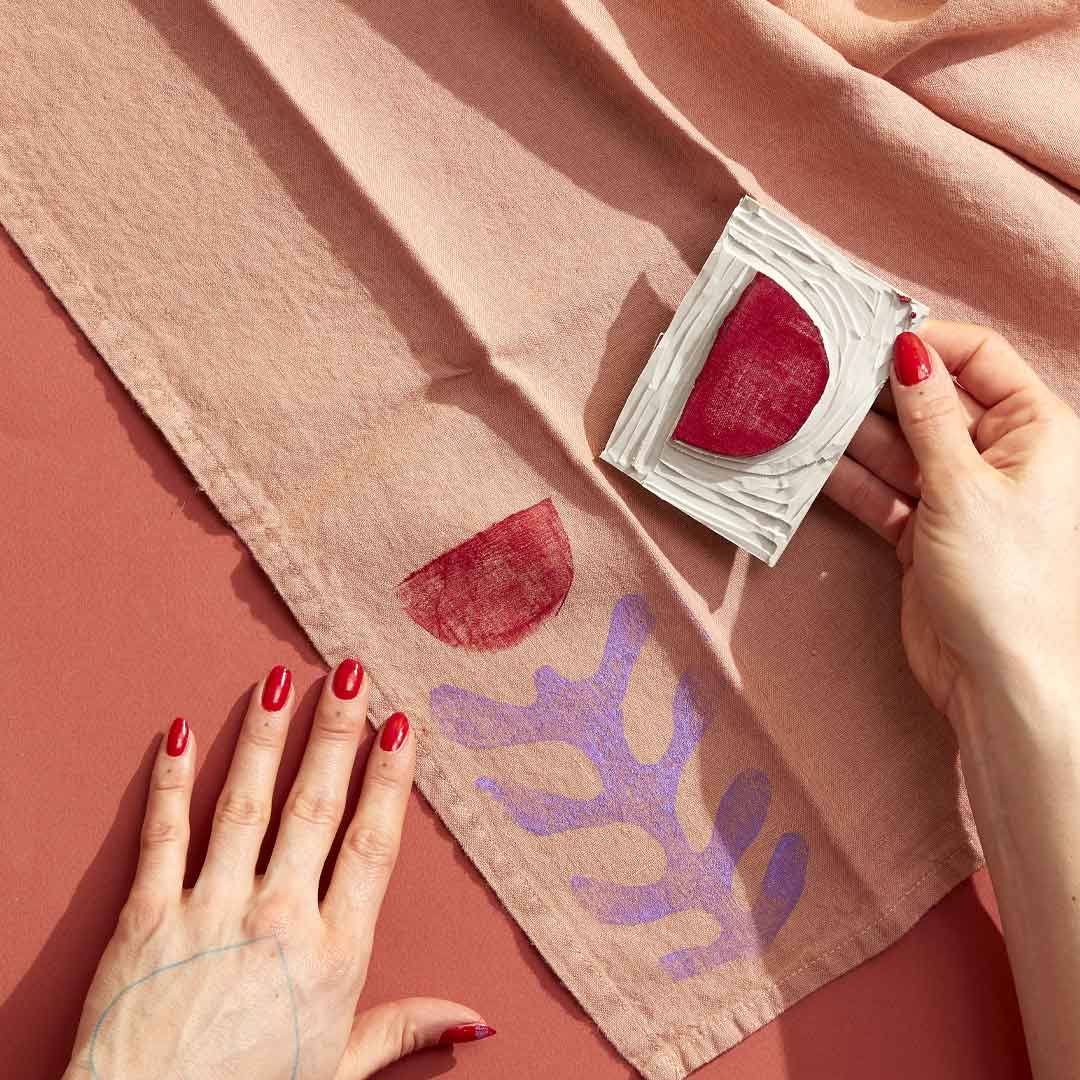
Block Print Tablecloth and Napkins
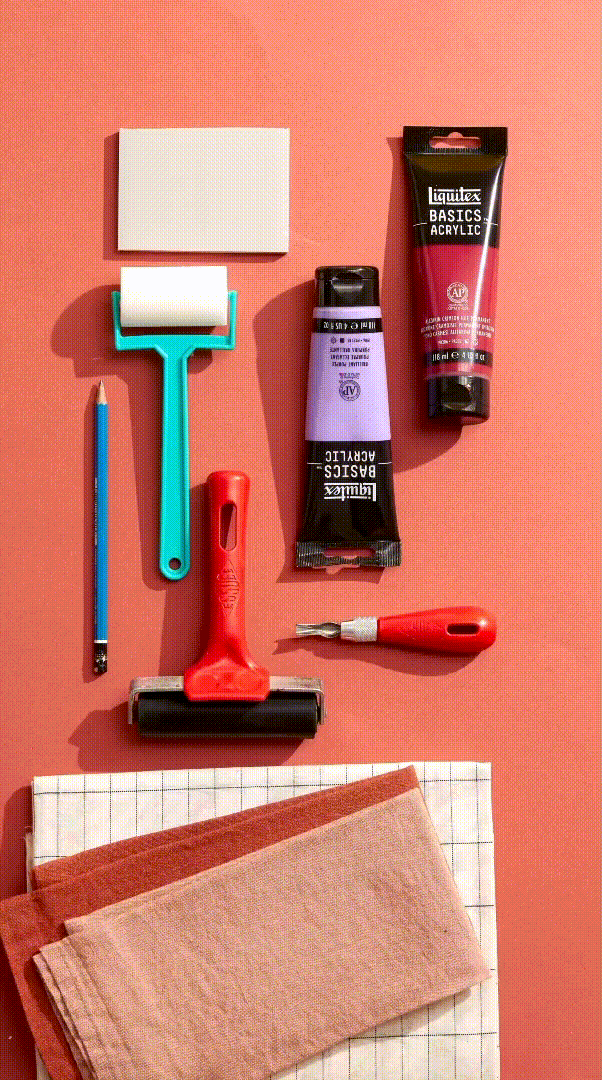
What you need :
- a lino block for linocutting
- a gouge for linocutting
- textile or acrylic paint
- a wooden pencil
- an ink roller or a foam roller
- fabric for your tablecloth and napkins
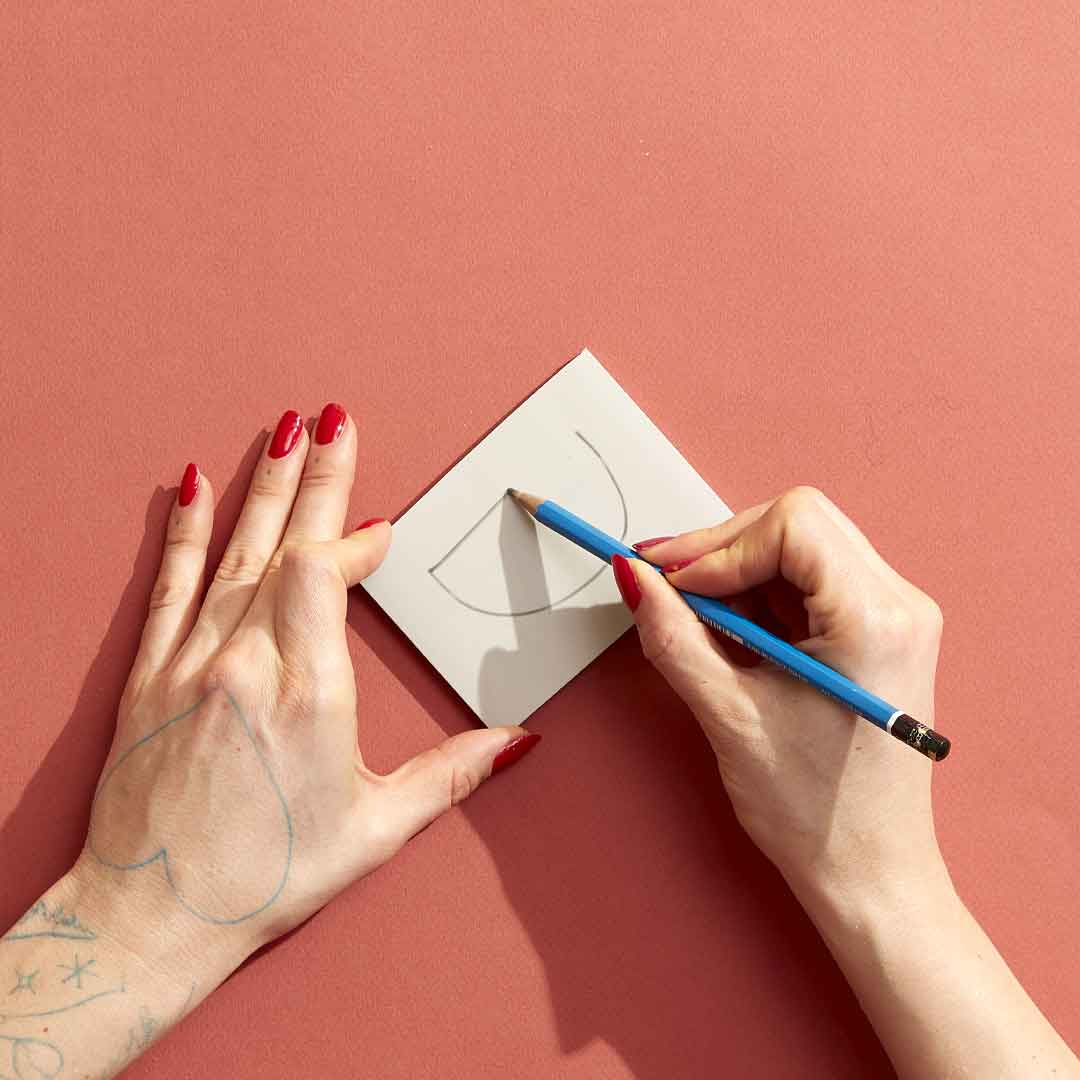

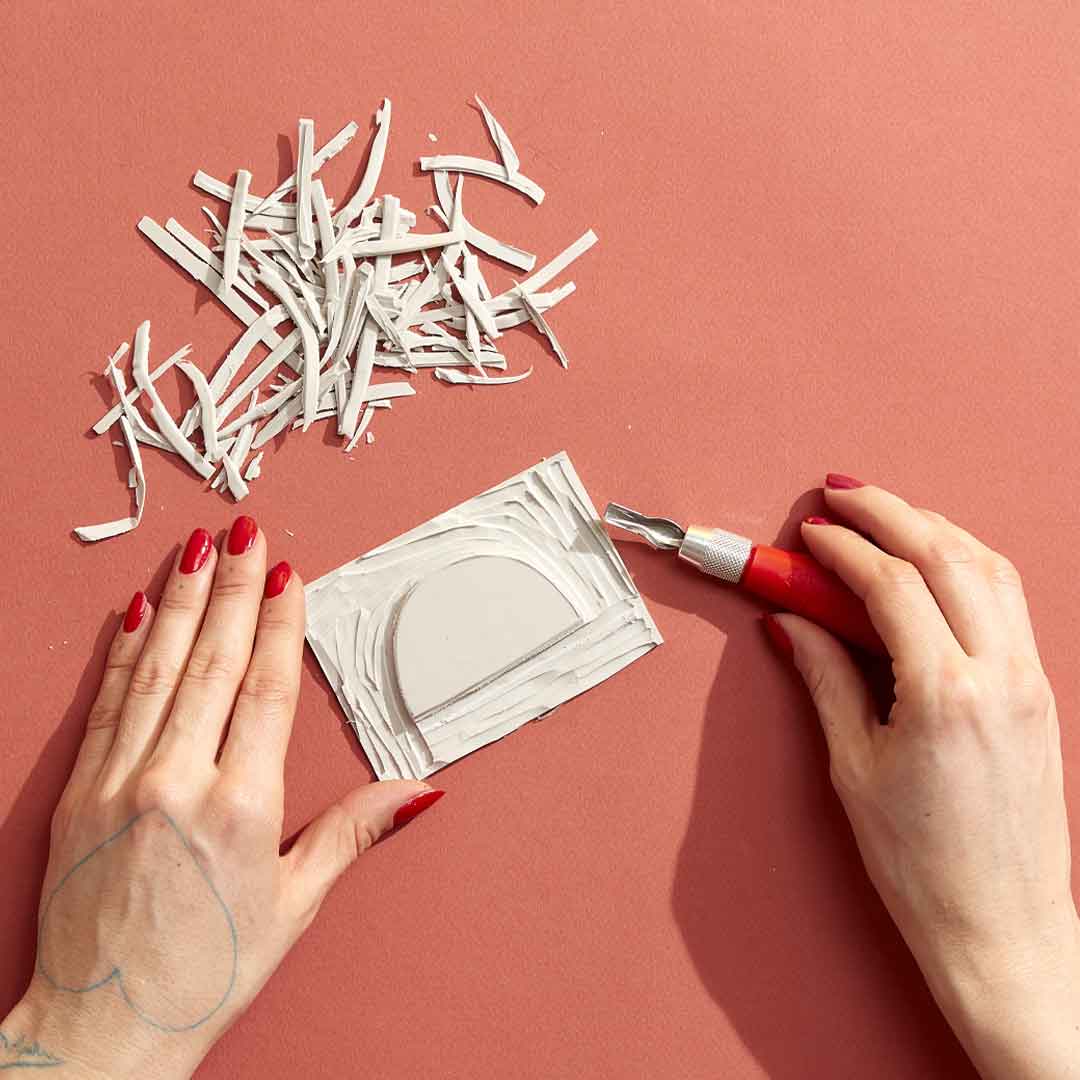
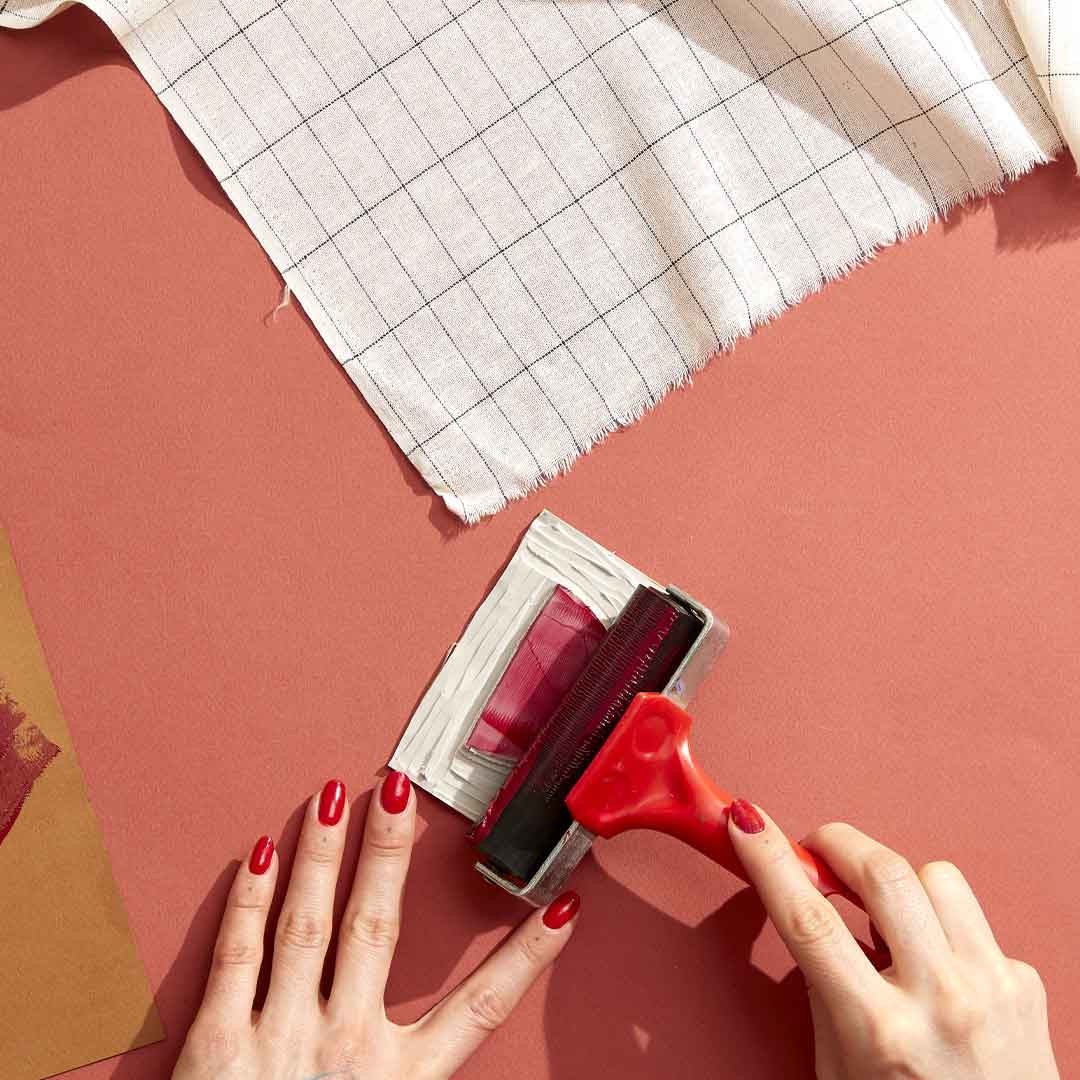
4# Once your shape is defined, you can ink your stamp with a roller and paint. Make sure you are on a flat surface before you start coloring.
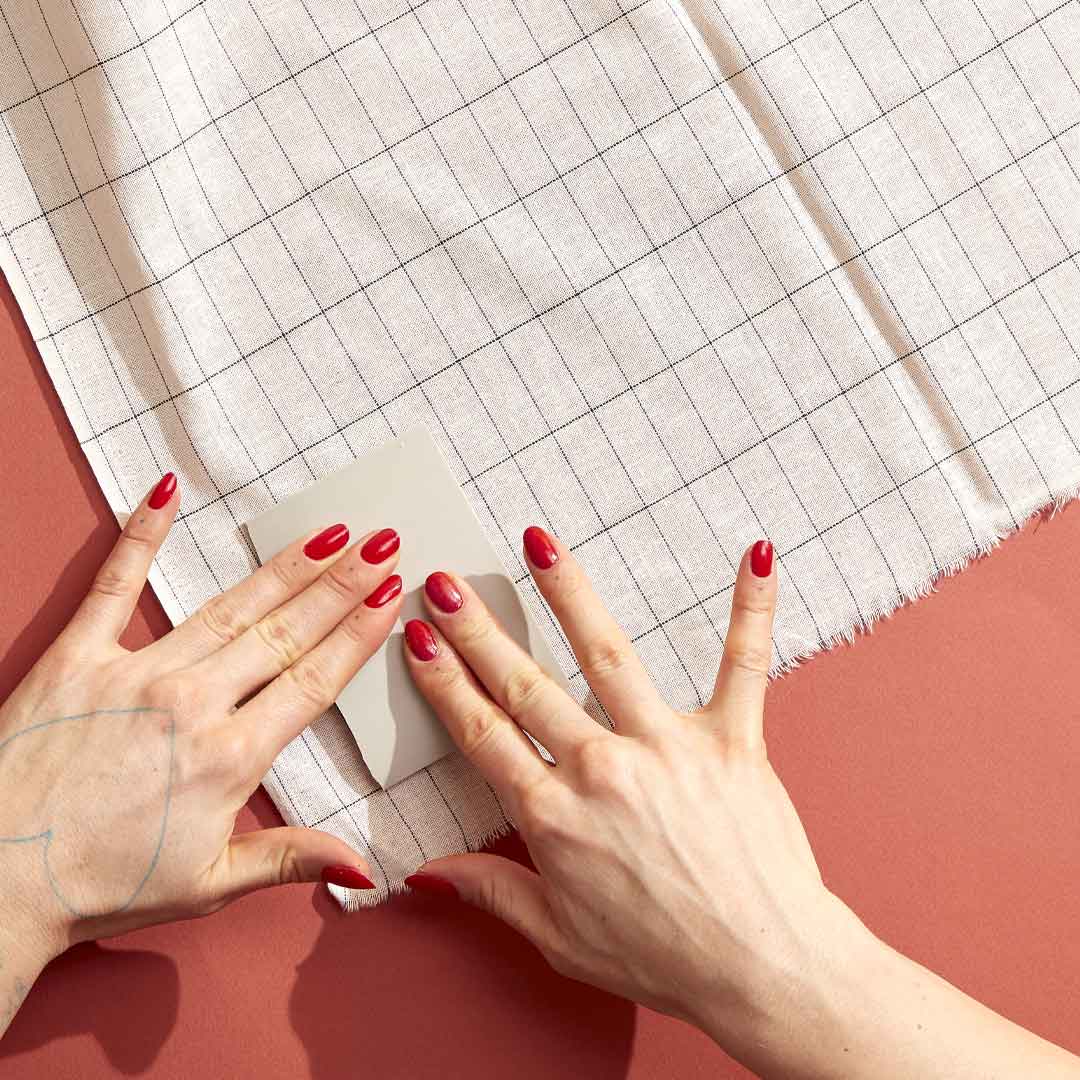
5# Turn your stamp over onto the fabric and press for a few seconds, turn your stamp back over again and admire your work!
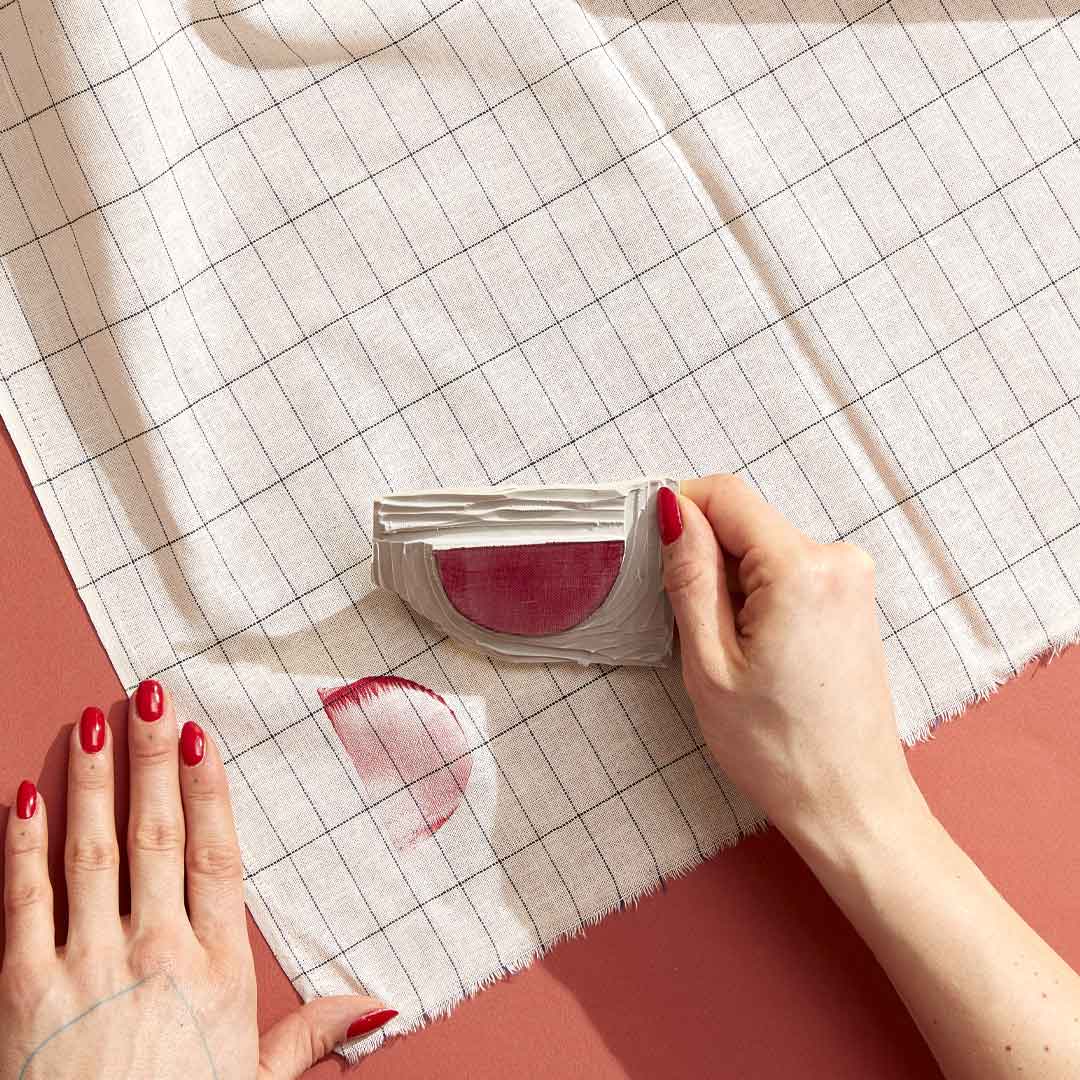
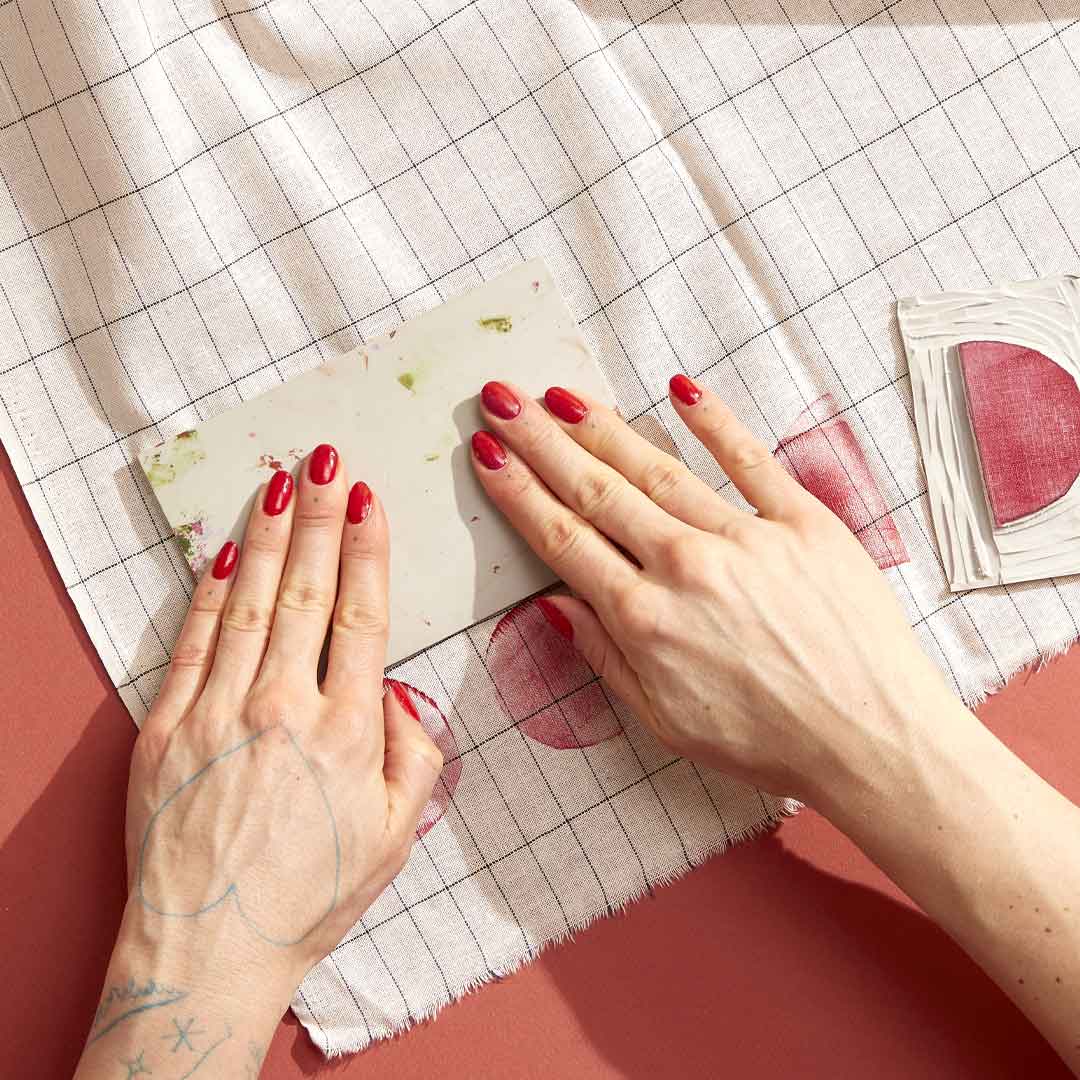
6# Continue inking your stamp between each application and create patterns. Remember to clean your material if you want to change colors.
7# Have fun with colors and shapes to fill your tablecloth!
8# Don't hesitate to choose colored fabric bases like the towels shown here, the technique lends itself perfectly to darker colors. Let dry for a few hours, iron and enjoy!

My Creative Table By...
Uncover the other creations imagined by the talented friends of the Maison and get inspired to plan your table!